Set up and use the Logos Storage UI
Get started sharing and downloading files on the Logos Storage network
This document is accurate for Testnet v0.3.
The Logos Storage UI is a file-sharing application built on top of the Logos Storage Module. This guide covers running the application (through Logos Basecamp or by building it with Nix), configuring your node through the onboarding wizard, and using the UI to share, download, and delete files. It is intended for node operators running the application on Linux or macOS, or on Windows through Basecamp.
What to expect
- You can build and run a standalone Logos Storage UI application using a single
nix buildcommand. - You can configure your node through the onboarding wizard, in guided or advanced mode, and reach a running node.
- You can share files with other nodes and download files shared by others using a Content Identifier (CID).
- You can fetch a manifest and download its content privately over Mix, and stop and restart the node without losing your files.
Step 1: Run the application
You can install the application through Logos Basecamp (Option A), or build it from source with Nix (Option B).
Option A—Run in Logos Basecamp
- Download and install the latest release of Logos Basecamp.
- In the left bar, select Package Manager.
- Select
StorageinCategories, then click INSTALL in the Storage row. - In the Install Package? dialogue, which lists the
storage_modulemodule as a dependency to install alongside the UI, click Install. - Wait until the Action column of the Storage row reads INSTALLED. A new Storage icon appears in the left bar.
- In the left bar, select the Storage icon to launch the Logos Storage UI.
Option B—Build and run locally with Nix
This option needs Nix, so it is available on Linux and macOS only. On Windows, use Option A.
The application is built using Nix flakes. The output includes the storage UI plugin and supporting binaries. You need:
-
Nix with flakes enabled. Install from nixos.org, then enable flakes:
mkdir -p ~/.config/nixecho 'experimental-features = nix-command flakes' >> ~/.config/nix/nix.confVerify:
nix flake --help >/dev/null 2>&1 && echo "Flakes enabled" -
Git
-
Clone the
logos-storage-uirepository and enter the project directory:git clone --recurse-submodules https://github.com/logos-co/logos-storage-ui.gitcd logos-storage-ui -
Run the build command:
nix build -
Confirm the build succeeded by checking the
result/directory for the following outputs on macOS (.dylibfiles are replaced with.sofiles on Linux):result/└── lib/├── storage_ui_plugin.dylib # Qt plugin (loaded by the app)└── storage_ui_replica_factory.dylib -
Launch the application:
nix run-
To override a dependency with a local version, use
--override-input. For example:nix run --override-input storage_module/logos-storage git+file:///somewhere/logos-storage-nim?submodules=1
-
The first build compiles the storage engine and can take a long time; subsequent builds use the Nix cache. To work on the code, nix develop opens a shell with all dependencies available.
Build fails with HTTP 500 on BoringSSL fetch
Symptom: The build fails with the following error:
error: Failed to fetch git repository https://boringssl.googlesource.com/boringssl : error: RPC failed; HTTP 500 curl 22 The requested URL returned error: 500
fatal: unable to write request to remote: Broken pipe
Cause: Git's HTTP request size limits are too low for large repositories.
Fix: Increase the limits and retry:
git config --global http.postBuffer 524288000
git config --global http.maxRequestBuffer 100M
Step 2: Configure your node through onboarding
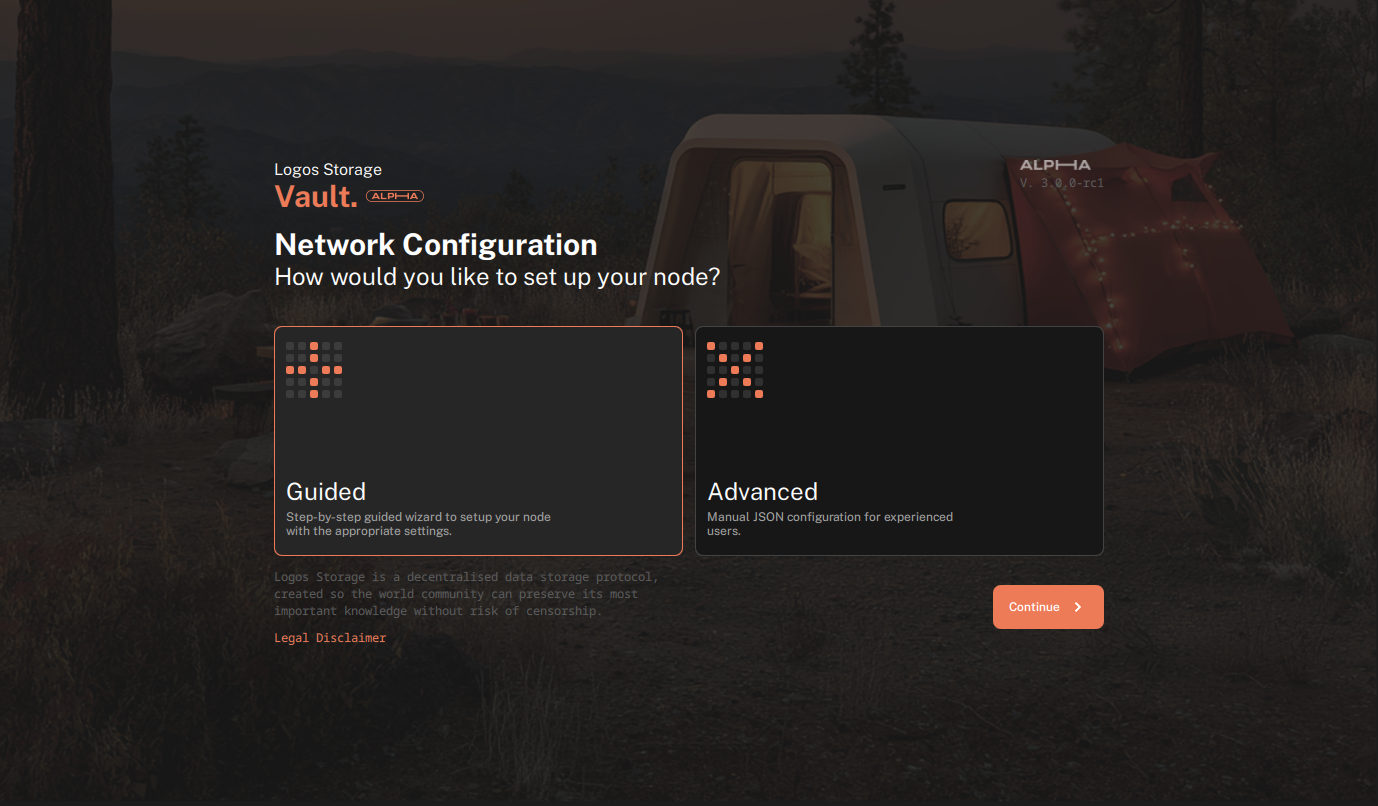
On first launch, the app opens the onboarding wizard and asks how you want to set up your node: Guided or Advanced.
The Guided option will use the default configuration and start the node automatically. The Advanced option allows you to edit the configuration before starting the node.
This guide follows the Guided setup.
-
Select Guided and click Continue.
-
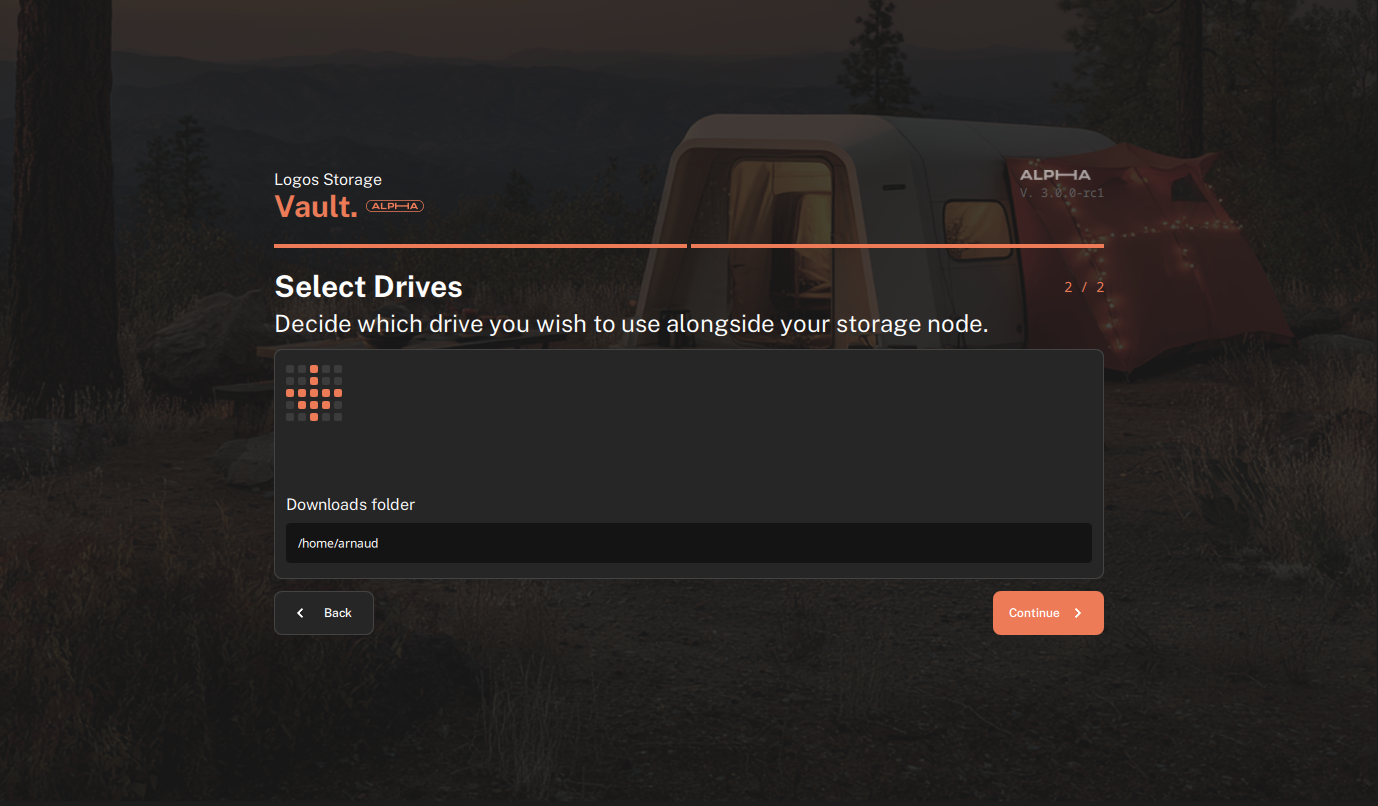
On the Select Drives step, choose the folder where downloaded files will be saved, then click Continue.
-
Wait for the dashboard to open and the node status icon to be green.
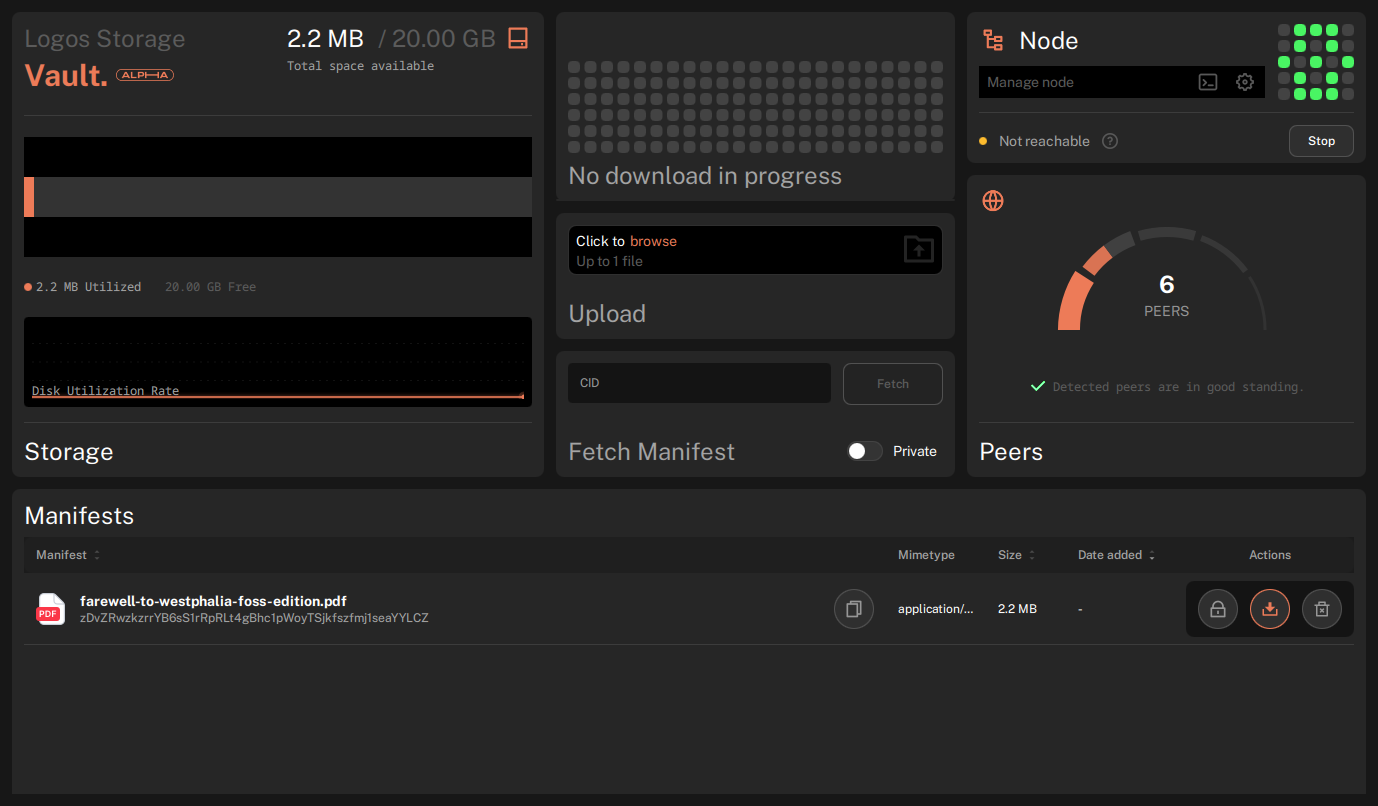
A red status dot means the node is not running.
When you start the node, you will see a status
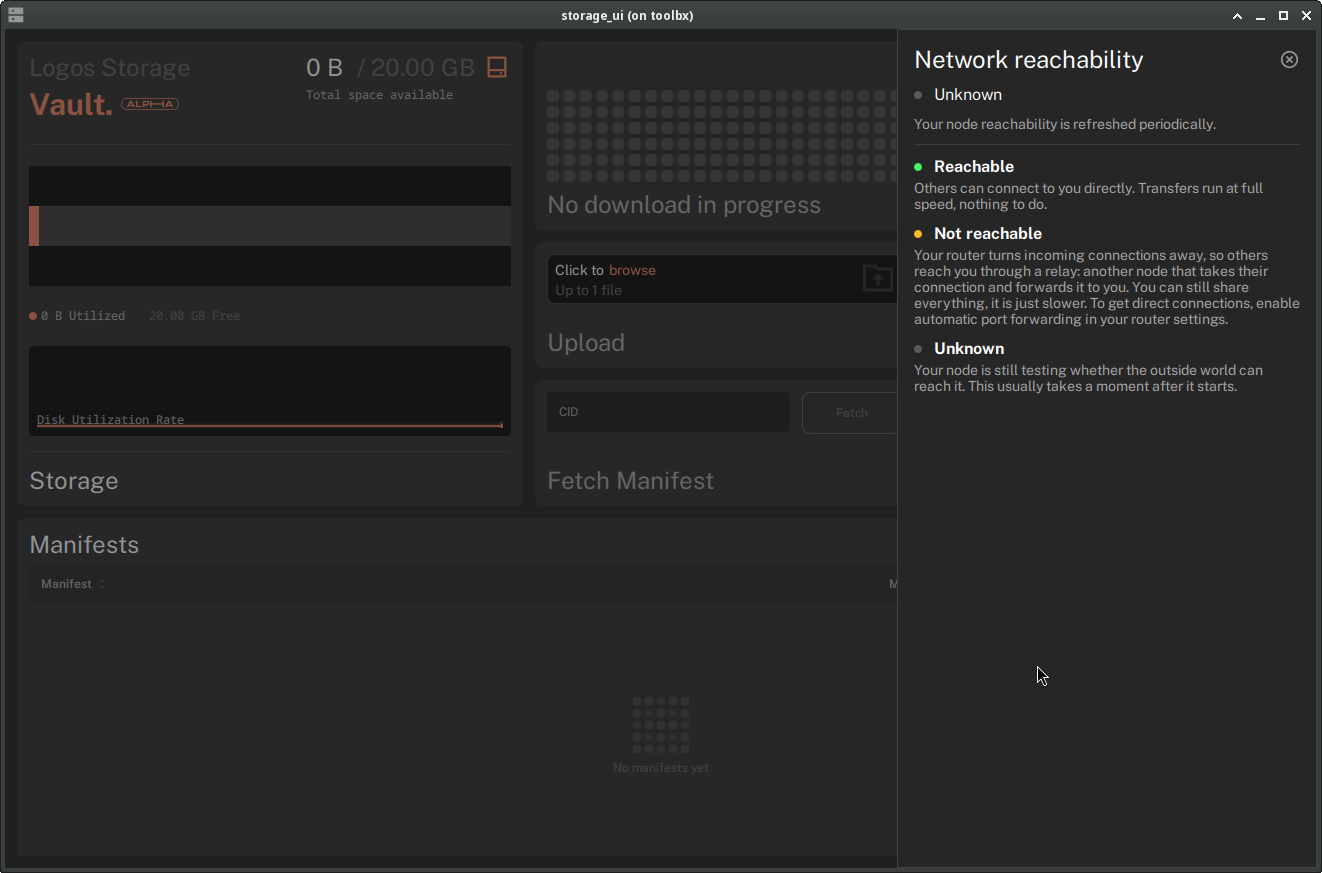
Unknownwith a grey dot blinking. This is the NAT status check, updated every minute. A grey dot means the reachability check has not been performed yet. A green dot means the node is reachable from the network and can upload and download content. An orange dot means the node is not reachable from the network but falls back to the relay network. The node can still upload and download content using a relay with other peers. The speed might be reduced unless both peers were able to create a direct connection (hole punching).See Connectivity.
-
Clicking on the help icon on the right of the NAT status will give you more information about the node's reachability.
Configuration
After onboarding, the settings are saved to a file whose location depends on the OS. If you are running the UI inside the Basecamp application:
| OS | Path |
|---|---|
| Linux | ~/.config/Logos/LogosBasecamp.conf |
| macOS | ~/Library/Preferences/com.logos.LogosBasecamp.plist |
If you are running the standalone app built with Nix:
| OS | Path |
|---|---|
| Linux | ~/.config/Logos/LogosStandalone.conf |
| macOS | ~/Library/Preferences/com.logos.LogosStandalone.plist |
Step 3: Share a file
-
In the Upload panel, click browse. A file selector opens.
-
Select the file you want to share and click Open. The file is uploaded to your node and sharing begins automatically.
-
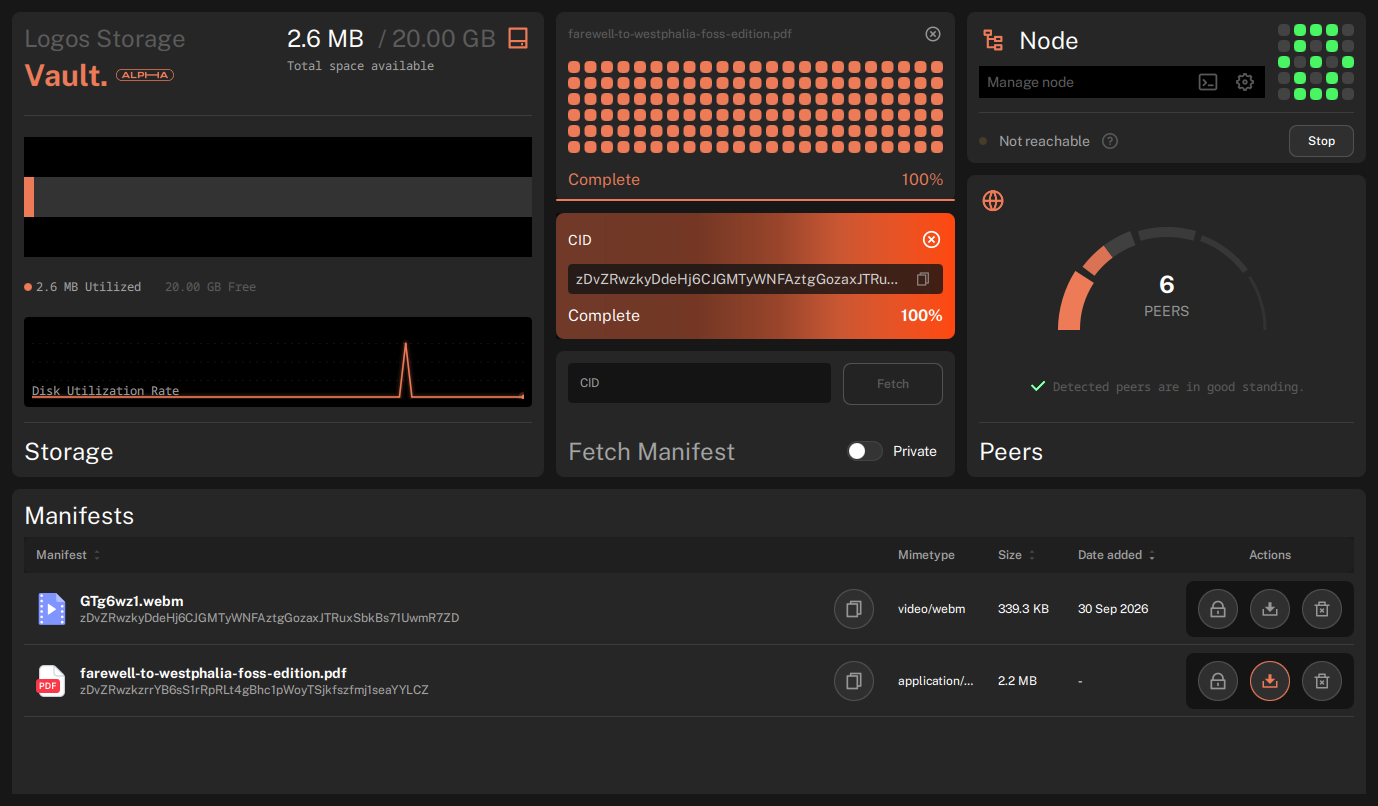
When the upload completes, the file appears in the Manifests list at the bottom of the UI, with its CID, filename, mimetype, and size.
-
Click the copy icon next to the CID. Share this string with others so they can download the file.
Step 4: Download a file
The manifest is the representation of a file on the network: it carries the metadata (filename, size, mimetype). To download a file, you first fetch its manifest by CID, then download the content itself.
-
Paste the file's CID into the Fetch Manifest panel and click Fetch. The manifest downloads from the network and an entry appears in the Manifests list.
-
In the manifest entry's Actions column, click the download icon.
-
Watch the download widget at the top: it shows progress in real time and reports Complete when the file has been written to the downloads folder you chose during onboarding.
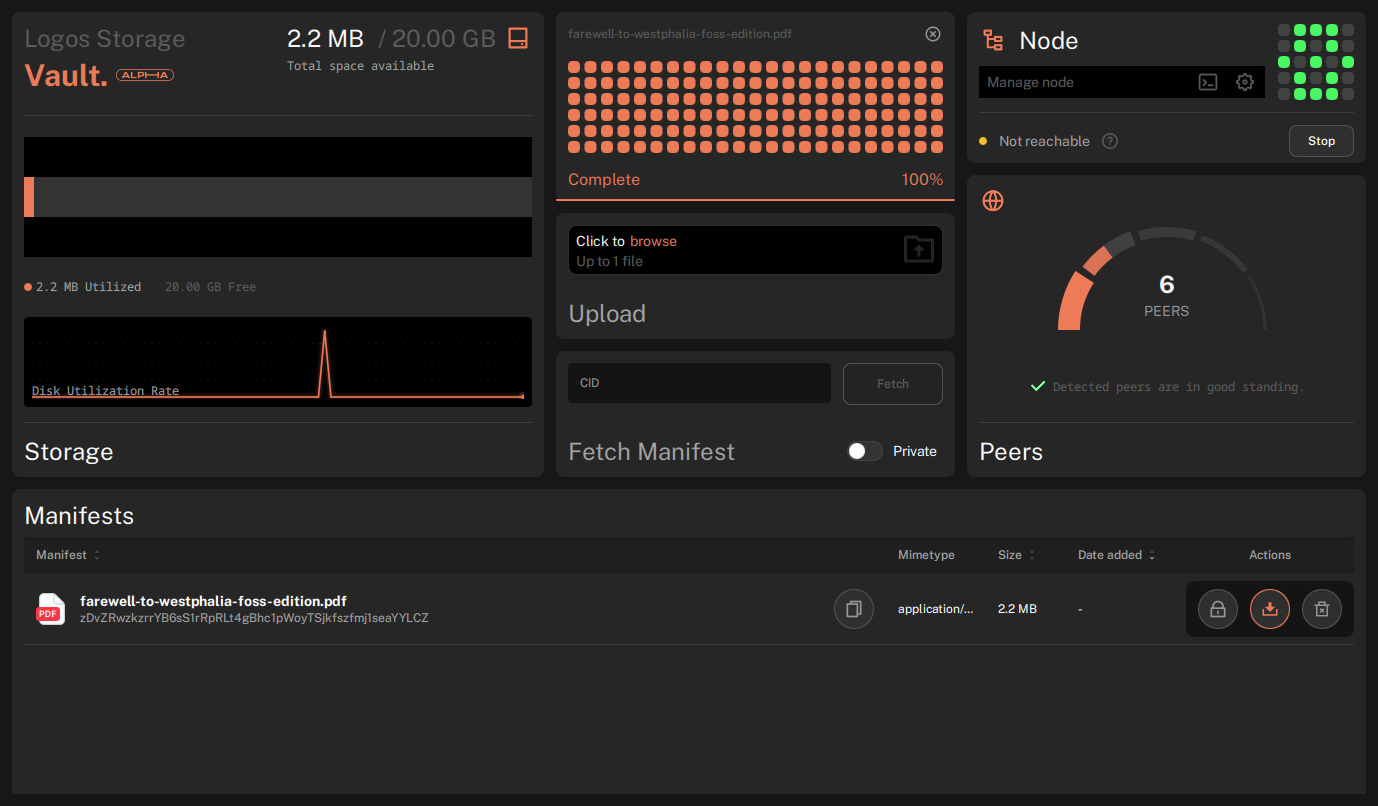
No CID at hand? Try downloading a public file: fetch zDvZRwzkzrrYB6sS1rRpRLt4gBhc1pWoyTSjkfszfmj1seaYYLCZ, the Farewell to Westphalia book. It is available on the network the default configuration connects to.
When the file is downloaded, the download icon turns orange. This means the file is in your downloads folder.
Step 5: Fetch and download privately with Mix
A private fetch or download goes over the Logos mix network. This makes it much harder to trace back to you. See Mix for how it works.
-
To fetch a manifest privately, turn on the
Privateswitch in theFetch Manifestpanel, then clickFetch. -
To download a file privately, click the lock icon in the manifest entry's
Actionscolumn. The icon turns orange. A private download is not advertised to the network.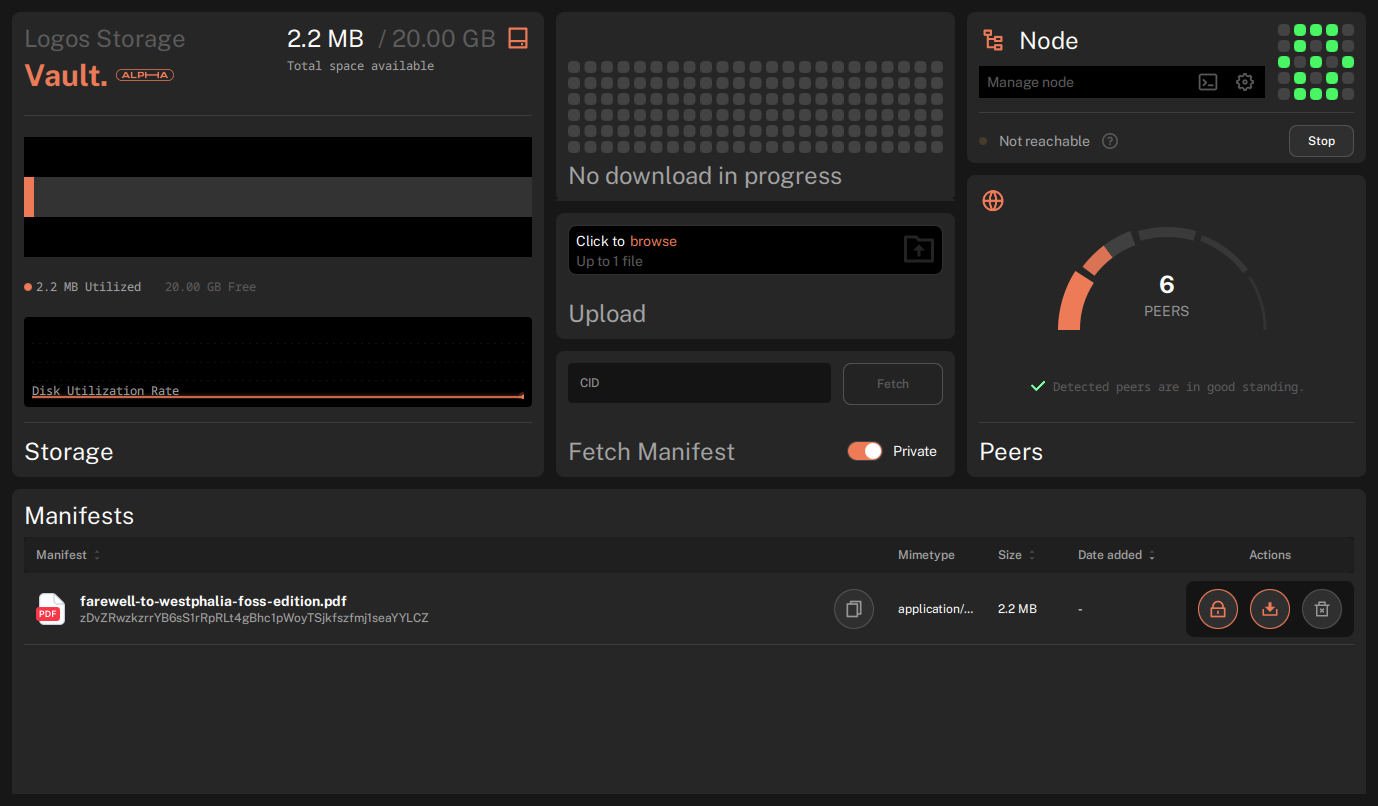
- By default, fetches and downloads are not private.
- After a private fetch, the lock icon is already on. Click it to download directly.
- Private transfers are slower.
When using nat:auto, the node first needs to get a reachability status, Reachable or Unreachable, before it can make DHT queries. See Connectivity for details.
Step 6: Settings
In the top right section, the settings icon on the right of Manage node opens the settings popup.
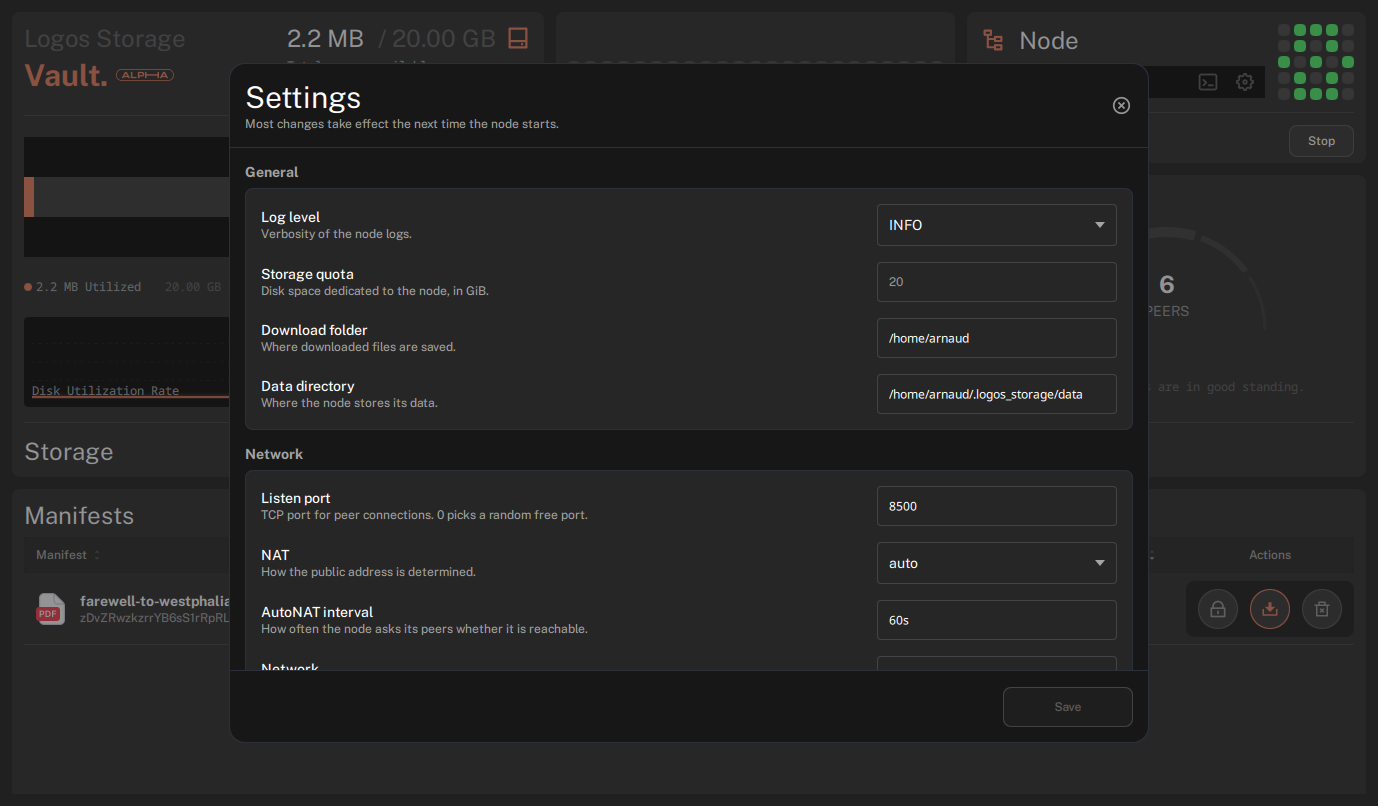
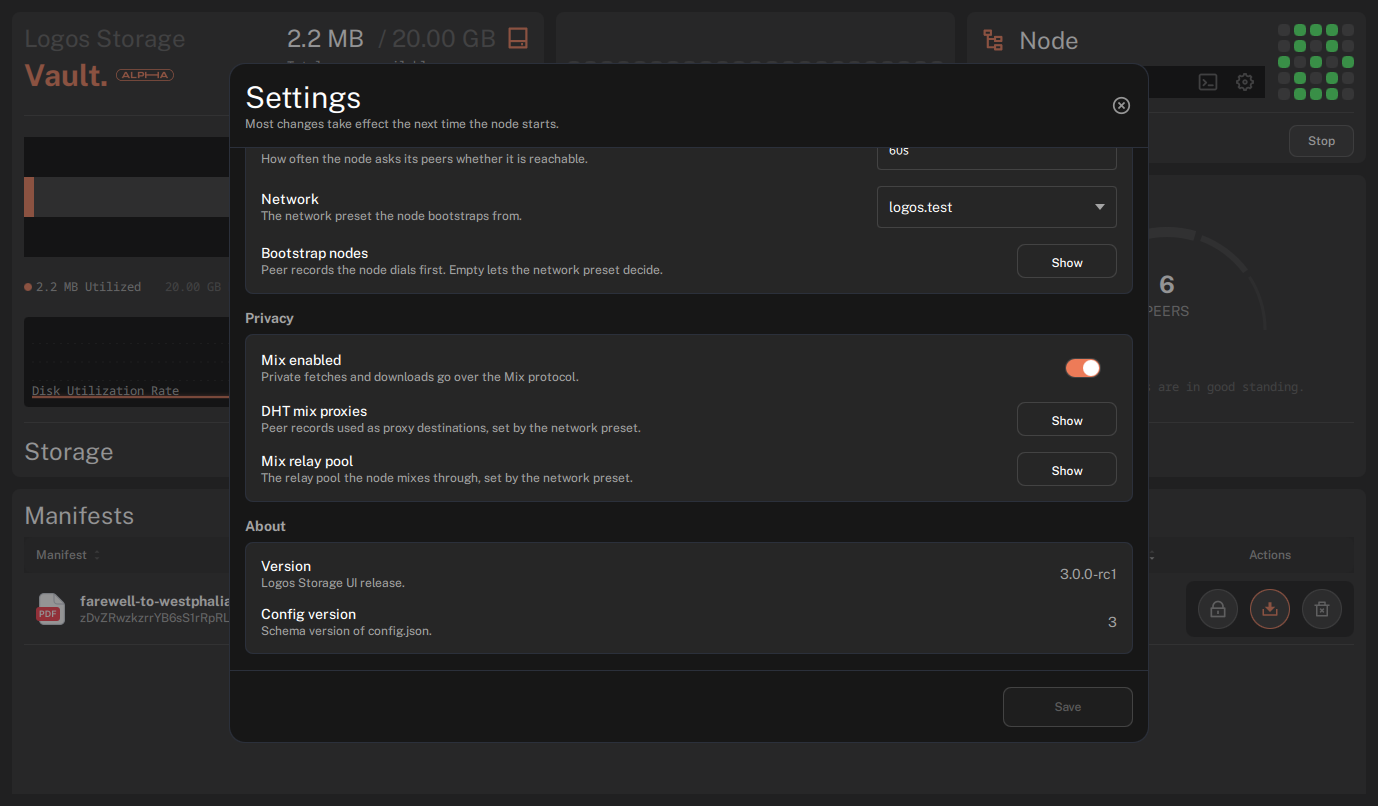
The default configuration should be suitable for most users.
Some settings cannot be updated, such as the Data directory.
Most of the editable settings will require a node restart to take effect. You should see a message indicating that on the bottom right:
Unsaved changes — the node must restart to apply them.
After you click Save, the message changes to:
Saved. Restart the node to apply and save to disk.
The new configuration is saved to disk only when the node restarts. Close the settings and click Stop then Start to restart the node.
The active configuration is saved to ${HOME}/.logos_storage/config.json. This file should not be edited manually. The settings UI should be used to change the configuration instead. If your configuration is messed up, you can delete this file and restart the node to reset it to the default configuration.
Step 7: Debug
A debug popup is available on the top right section, next to the settings icon. You can also display it using the Ctrl+D keyboard shortcut.
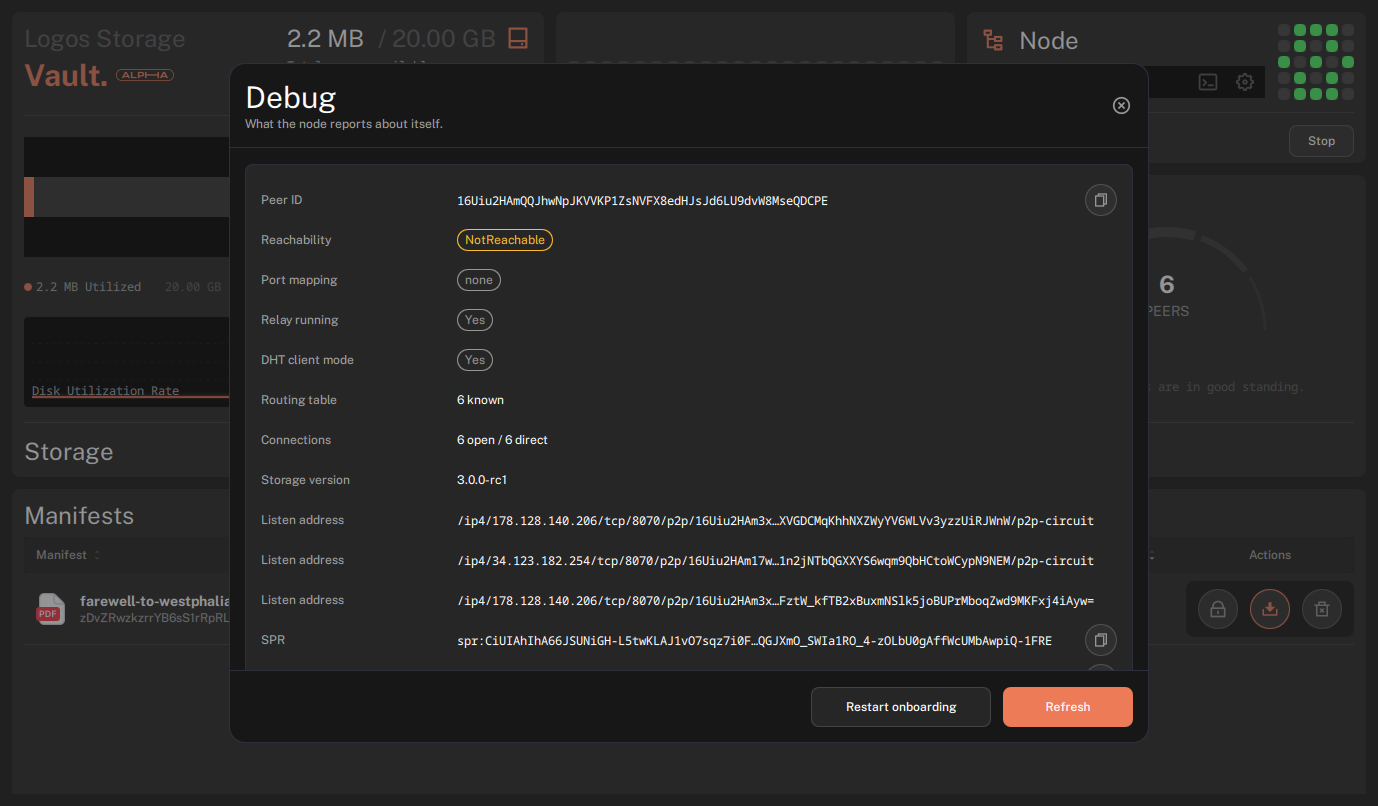
While it seems to be oriented toward advanced users, it can be useful to check the node's reachability status and if the relay is running.
Step 8: Manage the node lifecycle
-
To stop the node, click Stop in the Node panel. The status indicator turns red, the node reports Stopped, and peer connections drop.
-
Click Start to start the node again. The status goes back to the reachability check (Unknown, then Reachable or Not reachable) and peers reconnect.
- Your files survive the restart: the node persists its data in the configured
data-dir, so previously uploaded files reappear in the Manifests list.
- Your files survive the restart: the node persists its data in the configured
-
To stop sharing a file, click the trash icon in the manifest entry's Actions column. The file leaves the list and the Storage panel returns to 0 B Utilised: the blocks are actually removed from disk.
.lgxfiles have no trash icon: they are module packages downloaded from the Logos Package Manager in Basecamp.
Troubleshooting Logos Storage
Connectivity problems (no peers, unreachable node, downloads timing out) are covered in the Troubleshooting and Connectivity pages.