Build and run the Logos Blockchain UI app
Run a node that participates in consensus from the Logos Blockchain desktop app.
This document is accurate for Testnet v0.3.0.
The Logos Blockchain is the blockchain module of the Logos technology stack, providing a privacy-preserving and censorship-resistant framework for decentralised network states. You can run a Logos Blockchain node using the CLI or with the Logos Blockchain UI app, which drives the blockchain_module module from a graphical interface.
This procedure covers running the app (through Logos Basecamp or by building it with Nix), setting up a node through the onboarding wizard, confirming that it syncs, and funding its wallet so it can propose blocks.
-
A graphical desktop session on one of:
- Linux (tested on Ubuntu 24.04)
- Windows 11 with WSL2 (plus WSLg for the GUI)
- Apple Silicon Mac (M1 or later).
-
CPU: 2 Cores, 2Ghz. Modern multi-core processor. Must have ADX instruction support (on x86_64), such as Intel Broadwell or later, or any AMD Zen. On virtual machines, configure the hypervisor to pass through host CPU features. Generic CPU models such as
kvm64andqemu64hide ADX and cause the blockchain module to crash withsignal 4. -
Memory (RAM): Minimal (1 Gb).
-
Storage:
- For joining the testnet or a short-lived node: SSD with 1-2 GB free.
- Expected for a long-lived mainnet node: SSD with 100+ GB free with ability to expand storage on demand.
-
Network: Relatively reliable network connection. 1Mbps of free bandwidth.
-
To build from source: Nix with flakes enabled.
- Install from nixos.org, then enable flakes:
mkdir -p ~/.config/nixecho 'experimental-features = nix-command flakes' >> ~/.config/nix/nix.conf
What to expect
- You can run the Logos Blockchain UI app from Logos Basecamp or build it from source with Nix.
- You can set up and start a node in one click with Quick start, or through the onboarding wizard.
- You can fund your wallet by mining, so your node takes part in the consensus lottery.
Step 1: Run the application
Install the official release from the Basecamp catalogue, or build the same release from source. Either way, the app comes with the testnet bootstrap peers and LEZ channel ID built in.
Install from Logos Basecamp
-
Download and install the latest release of Logos Basecamp.
-
At the bottom of the sidebar, click Applications.
-
Select
Blockchainin Categories, then click the Blockchain card. -
In the Add Application dialogue, click Install. Under Required Packages, the dialogue lists the Blockchain app and the Blockchain Module core module it needs, and Install installs both.
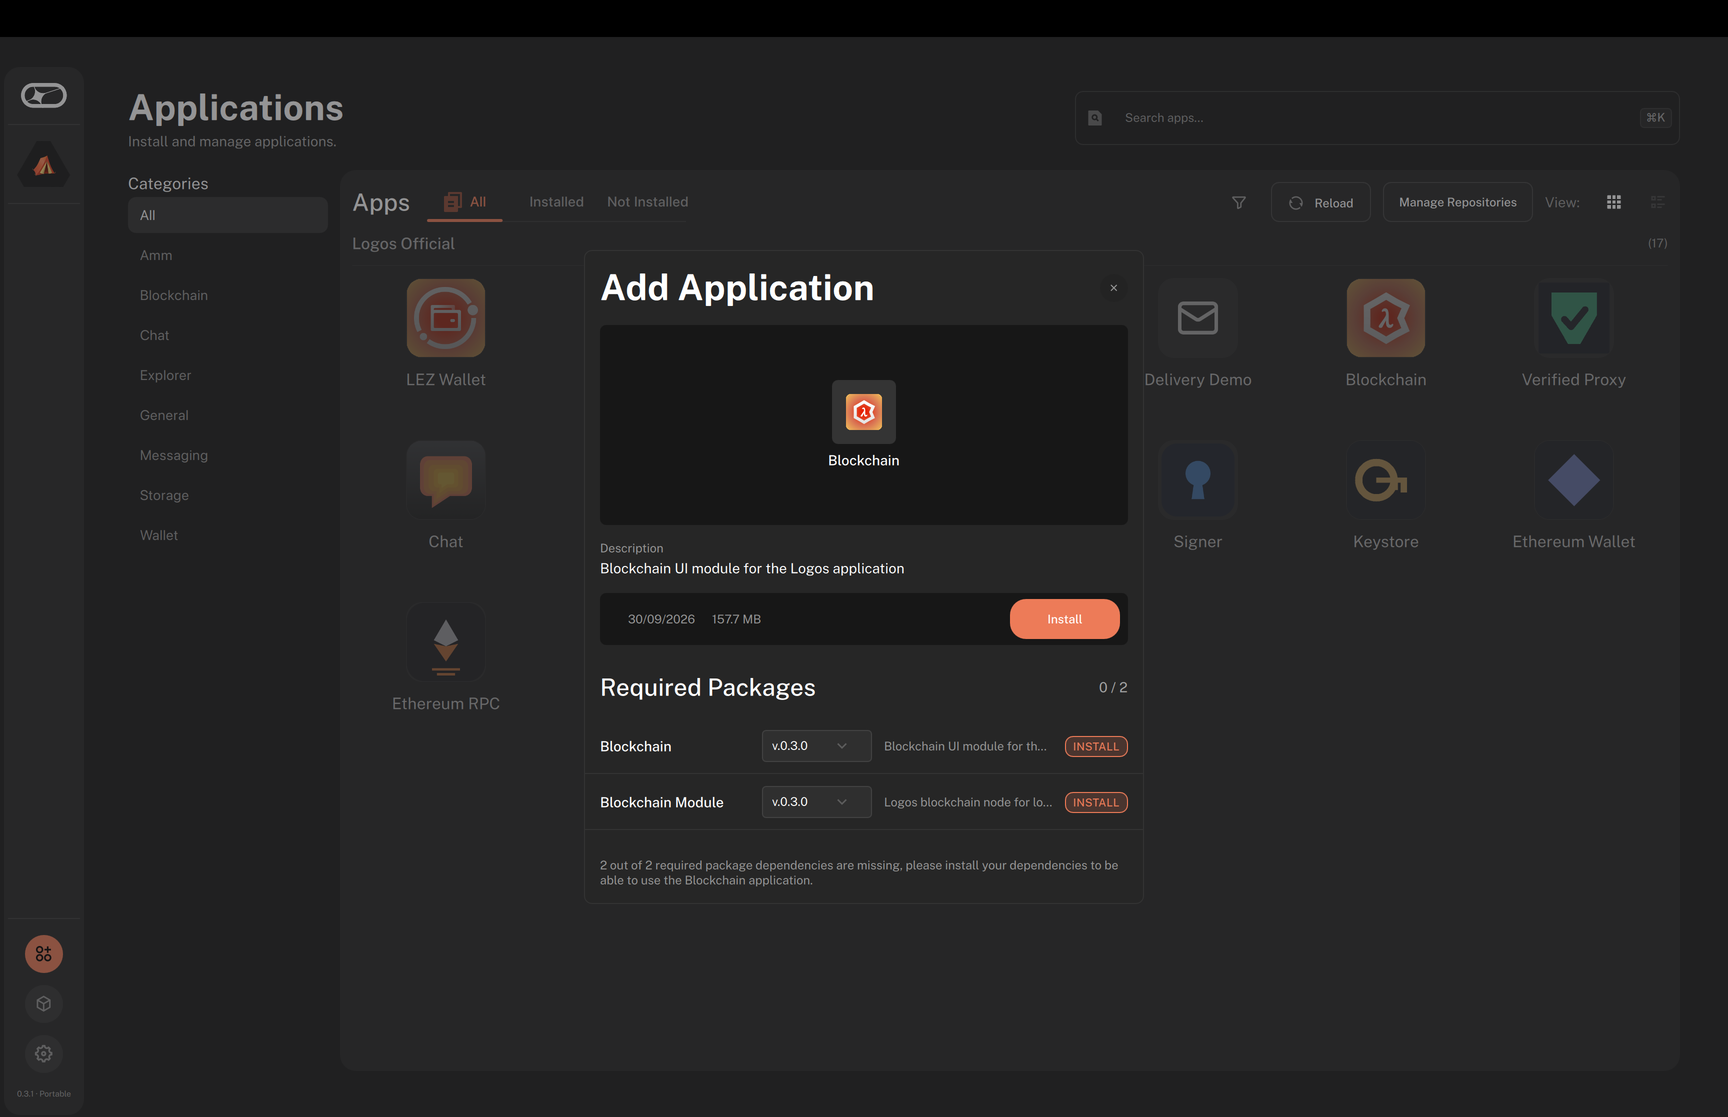
-
Wait until the button changes to Launch, then click it. A Blockchain icon appears in the sidebar, so you can reopen the app from there later.
To install packages one by one instead, see Install and load a module in Logos Basecamp.
Build from source
Build the standalone app from the release/0.3.1 branch of logos-blockchain-ui, the source of the blockchain_ui 0.3.1 catalogue release. Its flake.lock pins blockchain_module 0.3.0 and the node release it runs.
master runs ahead of the testnet, so a build from it can need node changes, bootstrap peers, and config updates that this page does not cover.
-
Clone the release branch and enter the project directory:
git clone --branch release/0.3.1 https://github.com/logos-blockchain/logos-blockchain-ui.gitcd logos-blockchain-ui -
Build and run the standalone app:
nix runinfoOn a cold Nix cache, the first run compiles the app and the node from source (Qt/C++ and Rust dependencies). This can take 20–60 minutes, or longer on slower machines. Later runs start from the cache.
Step 2: Set up your node
On first run, the app opens on a welcome screen titled Blockchain Node. A node needs a config and a keystore before it can start.
The welcome screen offers Quick start and Advanced. Quick start generates a config for the public testnet with the bootstrap peers built into the release, creates your keys, and starts the node. To walk through the same choices one at a time, or to reuse a config you already have, click Advanced and follow Step-by-step setup instead.
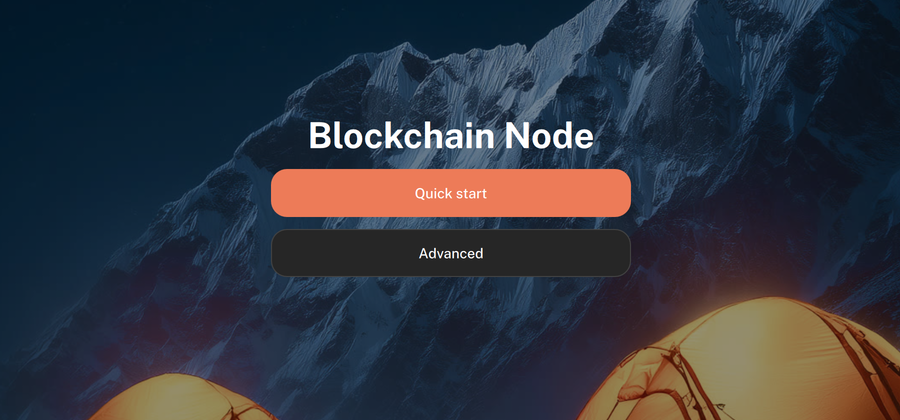
-
Click Quick start.
- The screen reads Setting up your node… while the app writes your config, creates your keys, and starts the node. The node view then opens.
-
Open the Settings tab. Until you back up your keys, the Node tab shows a Back up your keys notice that points here.
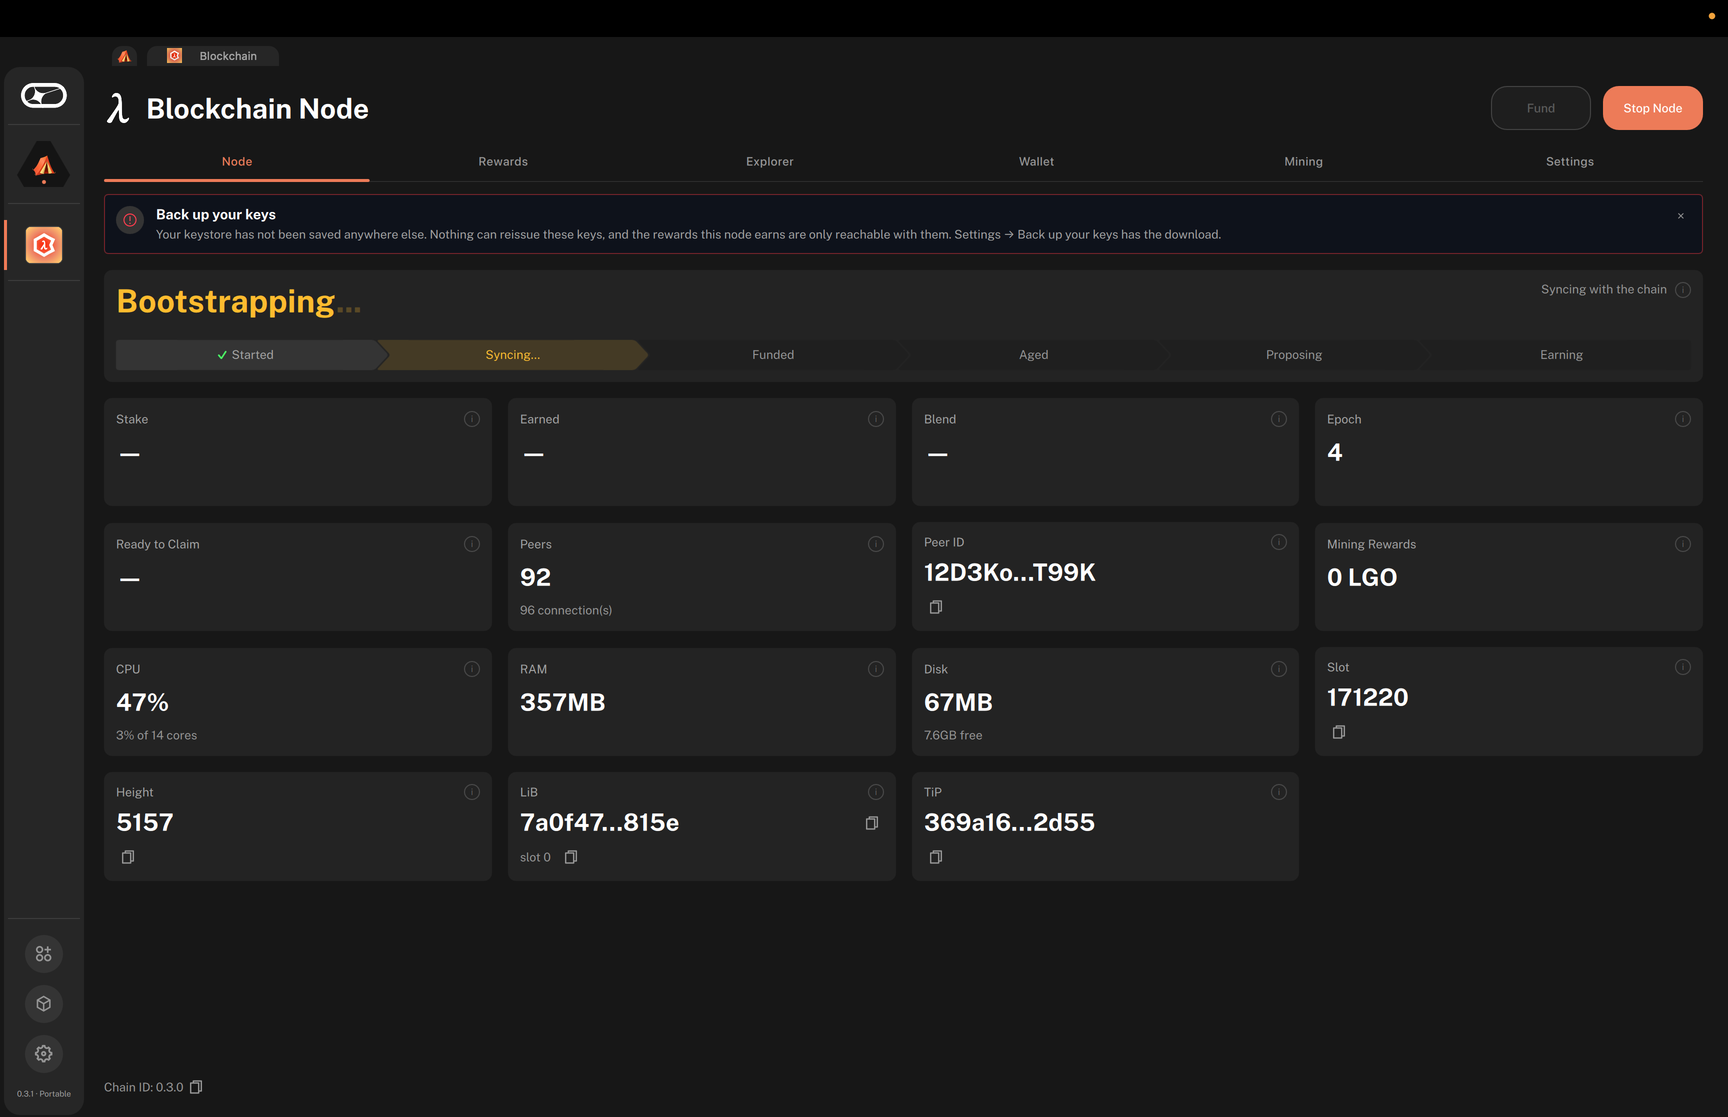
-
In the Back up your keys card, click Download keystore.yaml and choose where to save the copy.
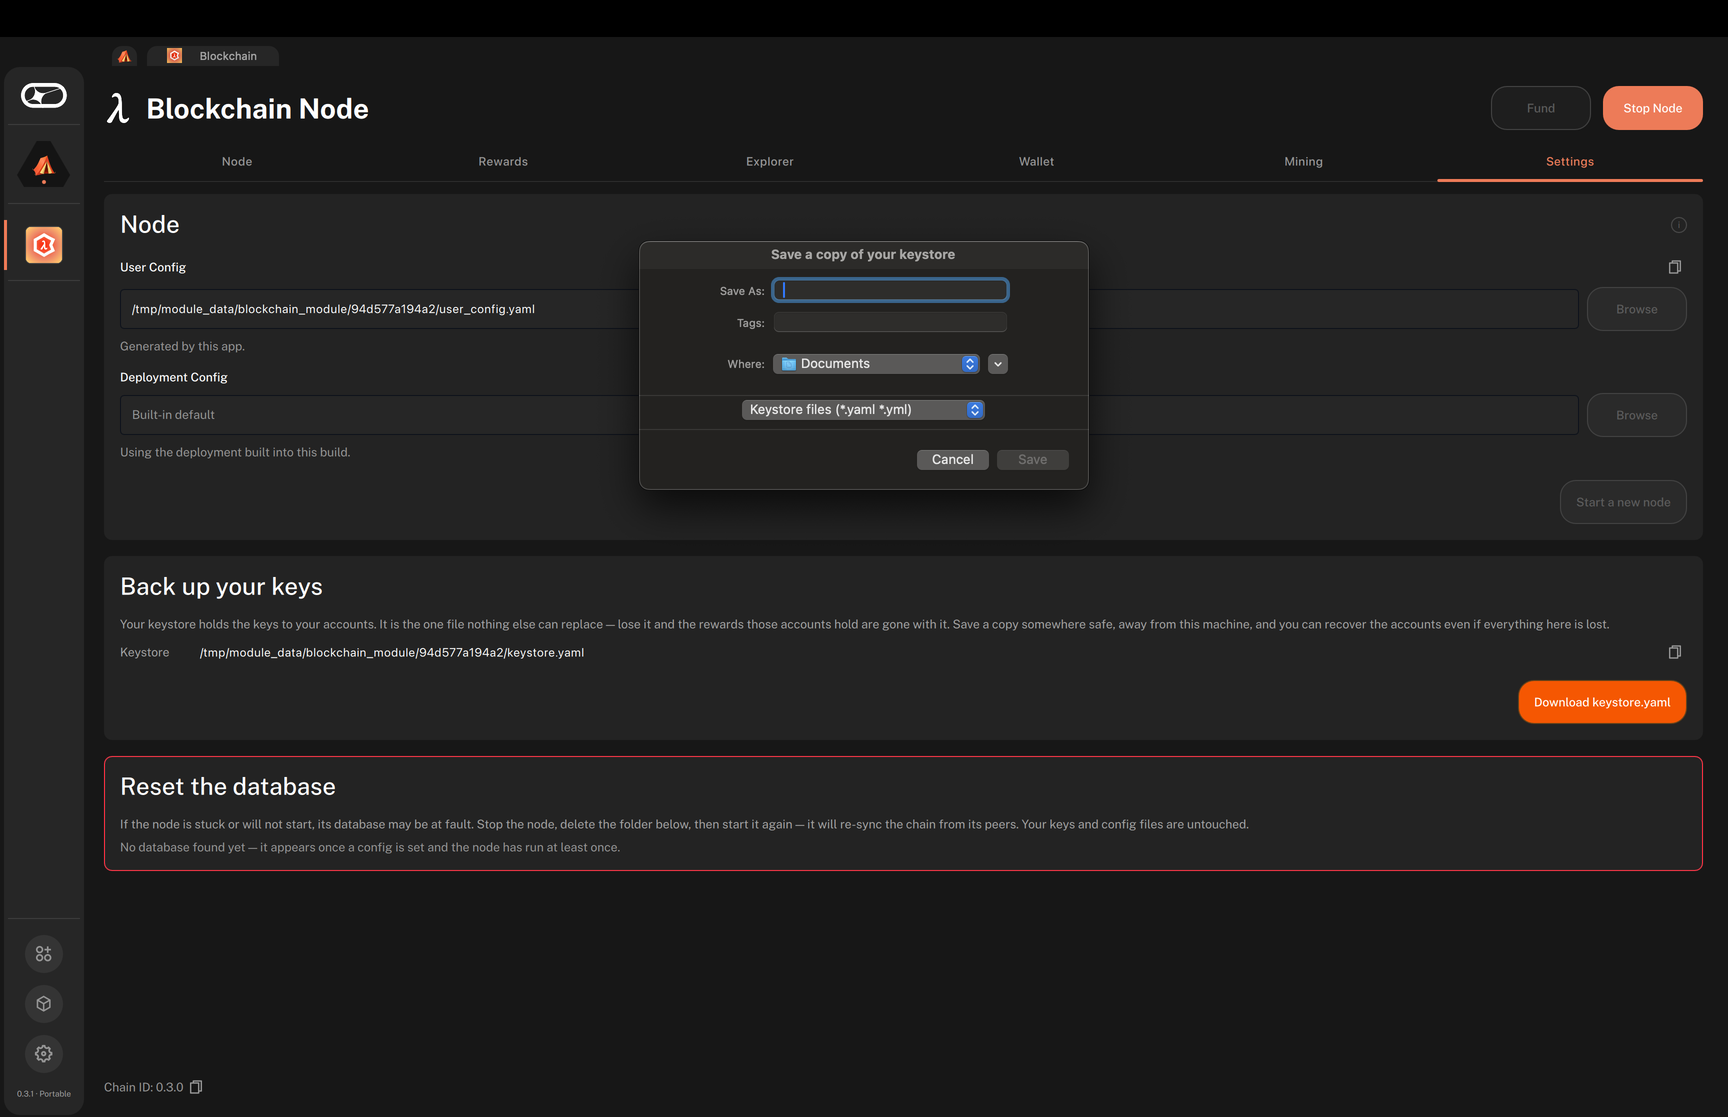
- A Keystore saved message confirms the backup, and the card shows a Done badge.
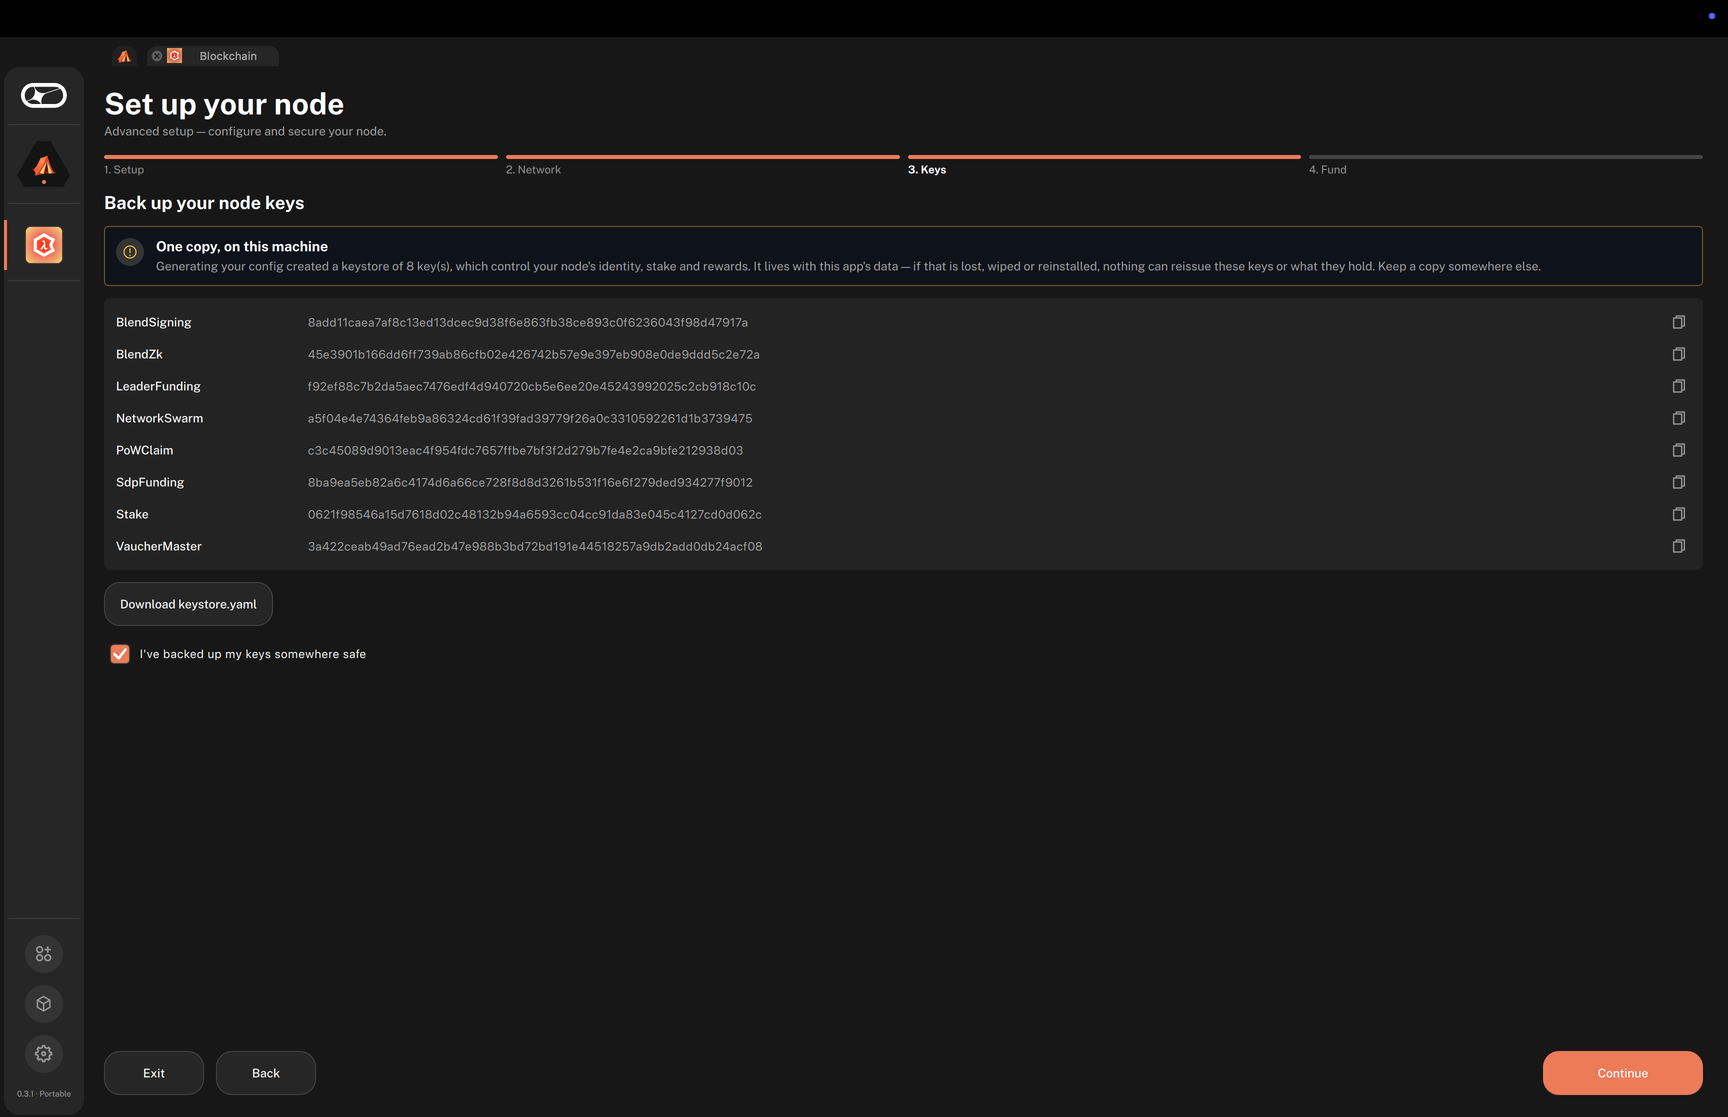
warningYour keystore holds the keys to your accounts, stake, and rewards. Nothing can reissue them. Keep the copy somewhere other than this machine.
Step-by-step setup
-
Click Advanced. The Set up your node wizard opens on step 1. Setup.
-
Under How do you want to start?, select Generate a new node and click Continue.
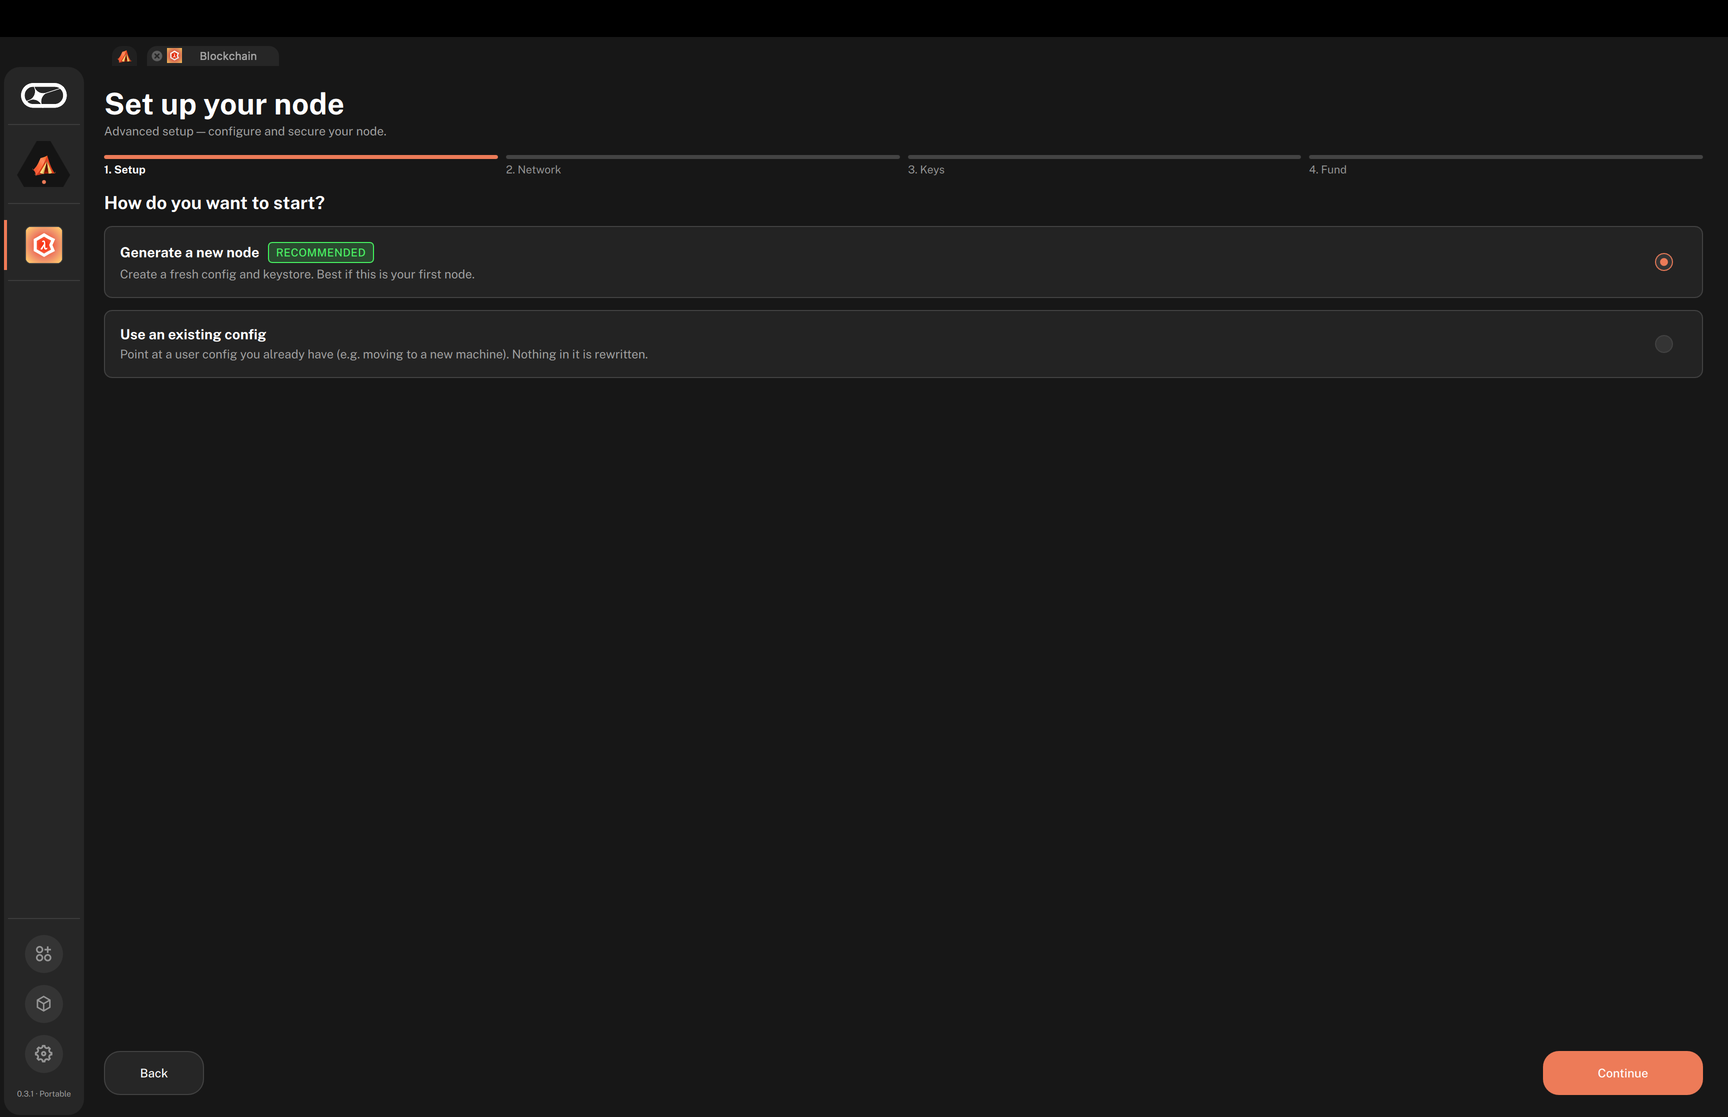
- To reuse files you already have, select Use an existing config instead, fill in User config (and optionally Deployment) under Point to your files, and click Start node. The wizard ends there.
-
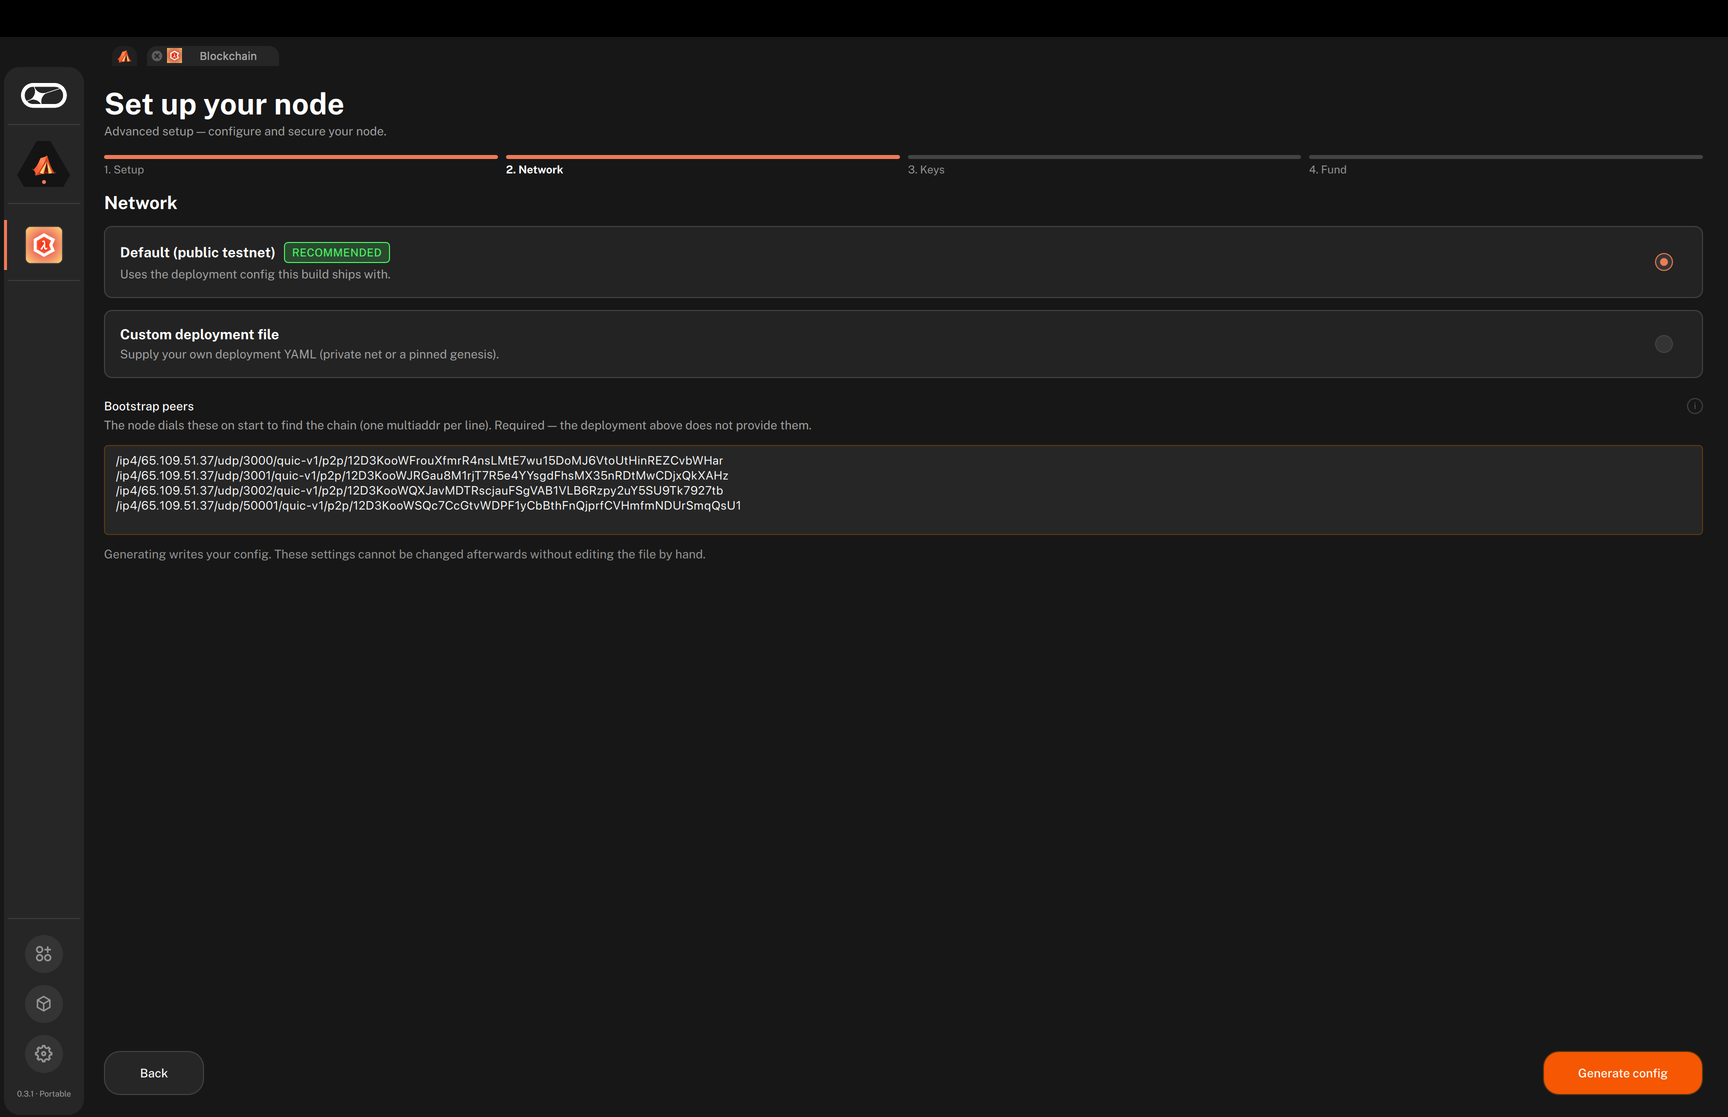
On 2. Network, leave Default (public testnet) selected. The Bootstrap peers field is already filled with the testnet peers built into the release.
-
Click Generate config.
- Generating writes your config. You cannot change these settings afterwards without editing the file by hand.
-
On 3. Keys, click Download keystore.yaml and save the copy somewhere safe. Select I've backed up my keys somewhere safe, then click Continue.
-
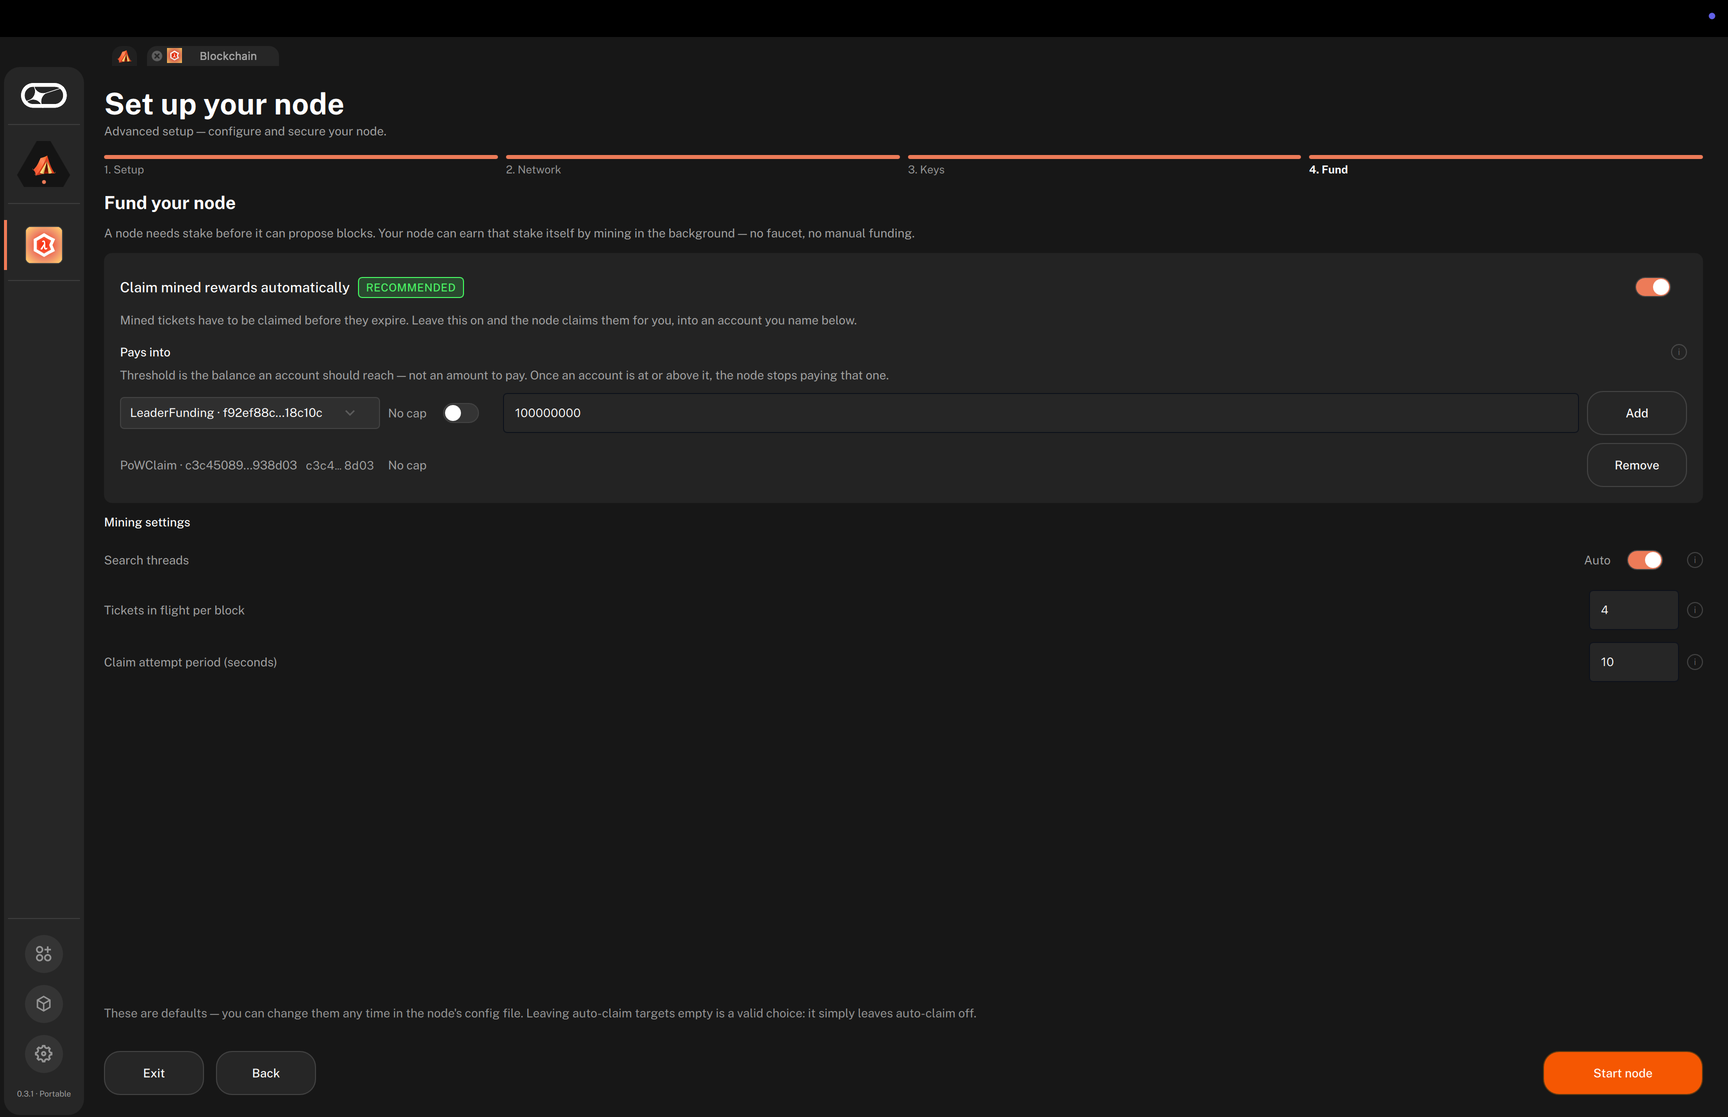
On 4. Fund, choose whether the node claims mined rewards automatically:
- Leave Claim mined rewards automatically on. Pays into already lists the target from your generated config: your PoWClaim account, with No cap. To pay into another account as well, choose it, set a threshold or switch on No cap, and click Add.
- Alternatively, switch it off. You can still mine with the Fund button and claim rewards yourself from the Mining tab.
-
Click Start node. The app saves your mining settings, starts the node, and opens the node view.
Step 3: Verify that the node is syncing
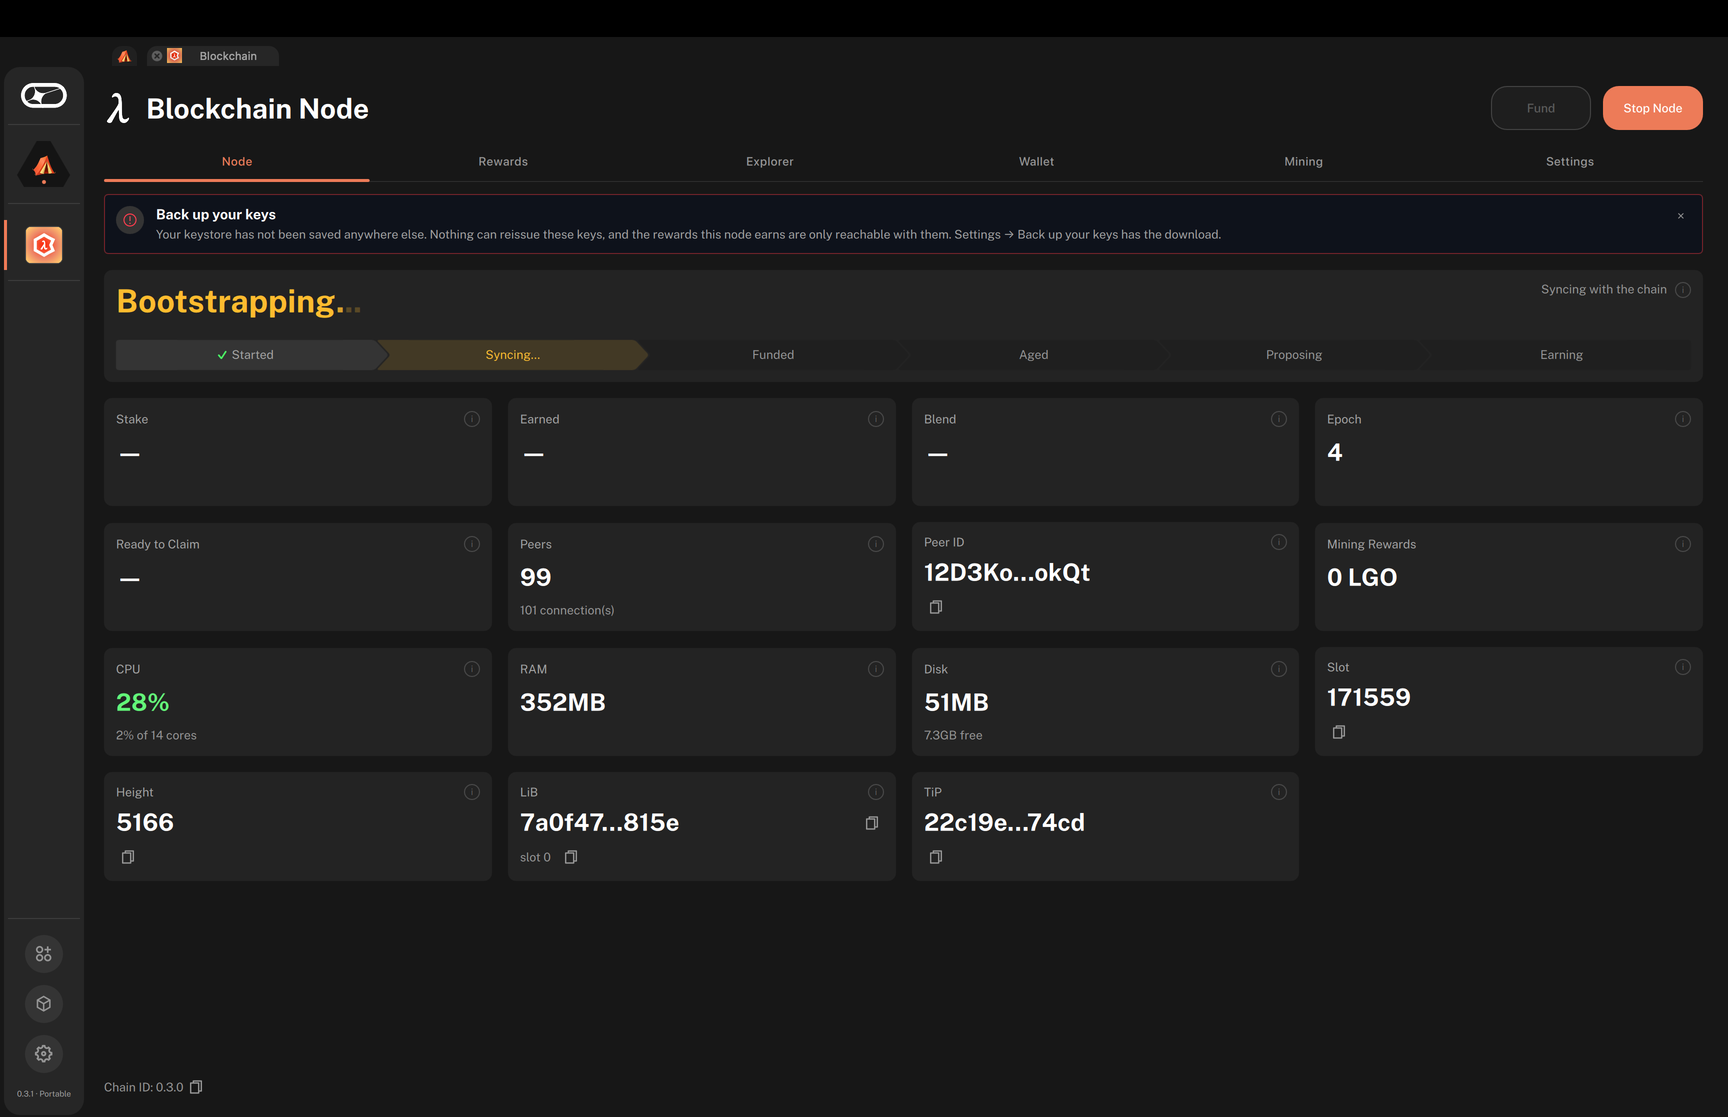
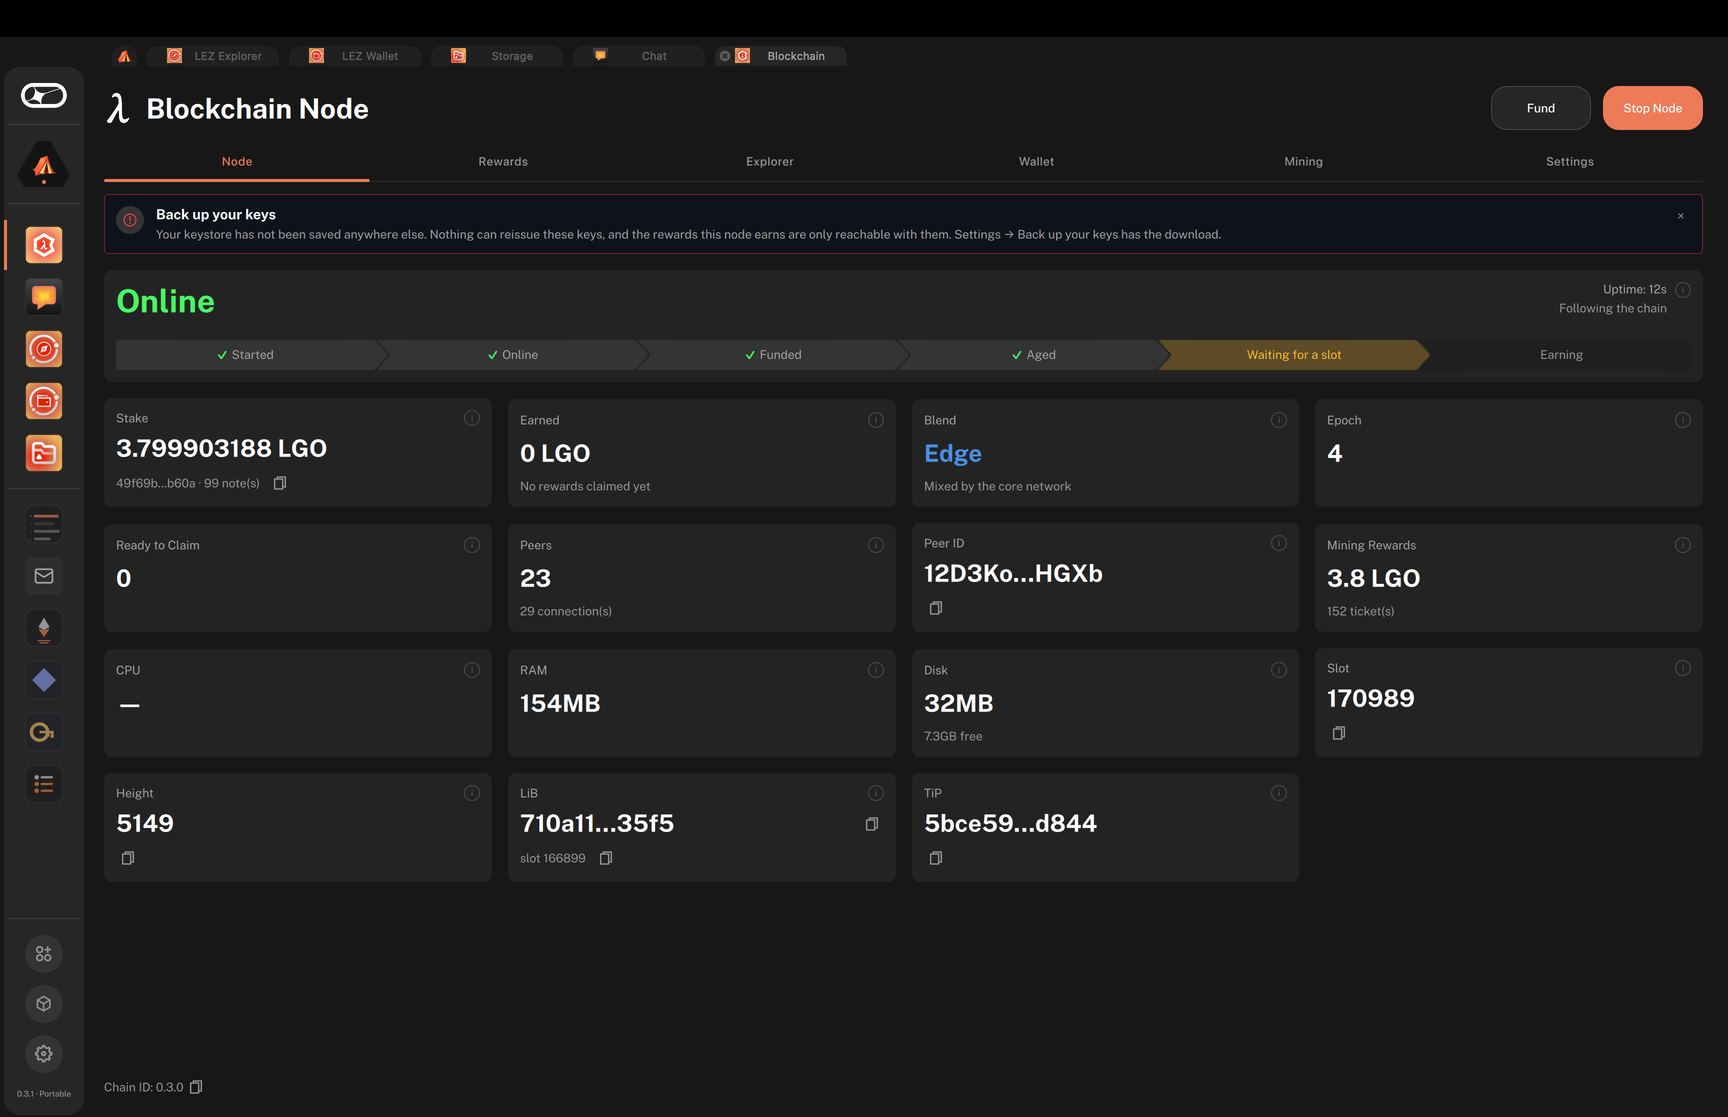
The Node tab shows the node's state as a headline, with a lifecycle lane underneath it (Started, Online, Funded, Aged, Proposing, Earning) that lights up one stage at a time.
-
Watch the headline. It moves from Starting to Bootstrapping (Syncing with the chain) while the node catches up, then to Online (Following the chain).
-
Check the Peers tile. It shows the number of connected peers, and should be greater than
0. -
Check the Height tile. Expect it to increase by about one block every 10 seconds once the node is Online. The timing is probabilistic, so some variance is normal.
- You can compare the height with the testnet block explorer.
- The Explorer tab lists each new block that this node sees from now on.
Step 4: Fund your node
A synced node validates the chain but does not propose blocks until its wallet holds stake. You fund it by mining.
-
Wait until the headline reads Online. The Fund button in the header stays disabled until then.
-
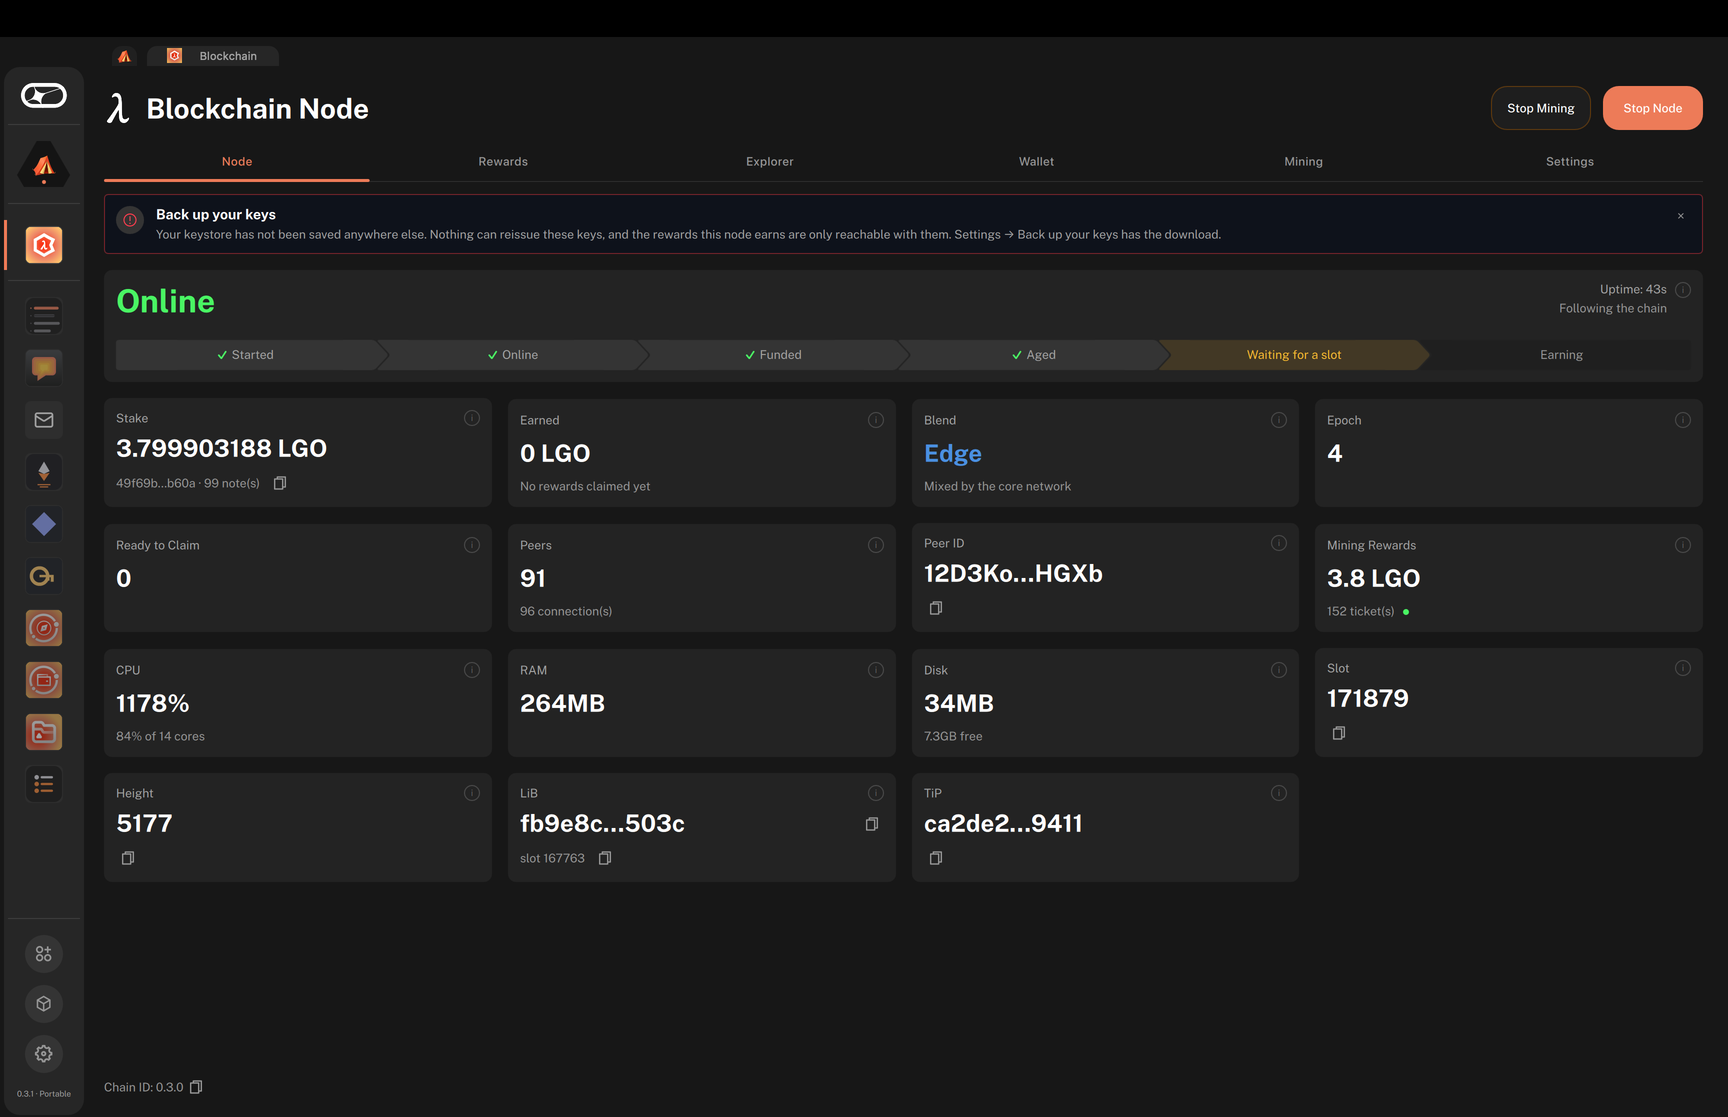
Click Fund. The node starts mining in the background and the button changes to Stop Mining.
 warning
Mining uses CPU for as long as it runs. It does not stop by itself: click Stop Mining when you have enough funds.
-
Open the Mining tab to follow mined tickets. A ticket pays nothing until it is claimed, and expires if it never is.
- By default the node claims tickets for you and pays them into your PoWClaim account, whether you used Quick start or step-by-step setup: the generated config lists that account as an auto-claim target.
- If you switched auto-claim off during step-by-step setup, claim tickets yourself under Manual claim, as described in Claim mining rewards.
- The Mining Rewards tile on the Node tab shows what mining has paid so far.
-
Open the Wallet tab, then click Accounts. Click Refresh and confirm the balance of your PoWClaim account, in TestToken.
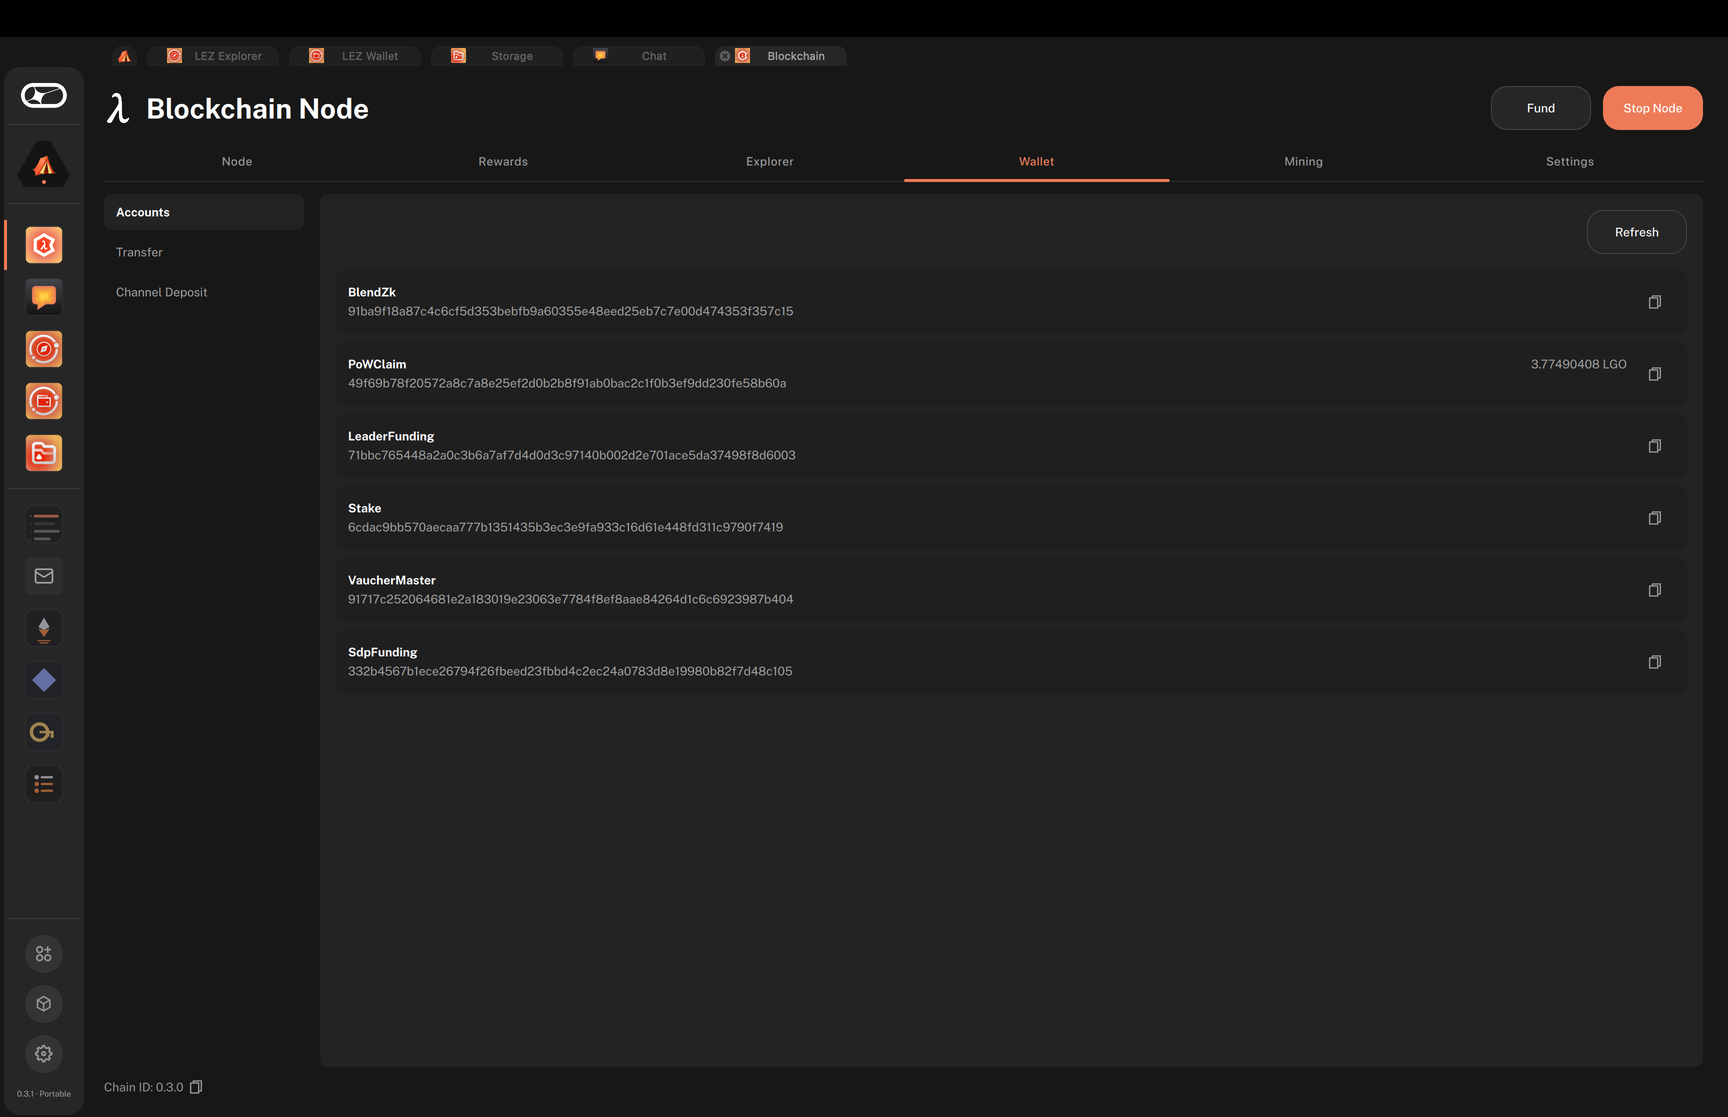
Once the wallet is funded, the Stake tile on the Node tab shows the value of the notes that have aged into the leadership lottery. Tokens can take up to two epochs to age in. After that, the node takes part in the consensus lottery automatically and starts proposing blocks. To claim the rewards it earns, see Claim leader rewards in the Logos Blockchain UI app.
Troubleshooting starting a node
The welcome screen only offers Set up your node
The app hides Quick start when it has no bootstrap peers: either it could not read the peers built into its metadata.json, or it was built from master, which has none. Click Set up your node and follow Step-by-step setup. On 2. Network, the Bootstrap peers field is empty: copy the testnet peers from the Initialize Your Node section of the Logos Blockchain release notes and paste them one per line. The release notes show them inside a CLI command: keep only the multiaddrs themselves, such as /ip4/<ip>/udp/<port>/quic-v1/p2p/<peer-id>, with no quotes, brackets, or commas.
A dialogue says Your config is out of date
The config was written for an older release, so the node won't start with it. Testnet v0.3 starts a new chain, so configs from Testnet v0.2 need updating. Click Update config: the app rebuilds the config for this release and keeps your settings and keys. If the dialogue reads This config can't be updated instead, there is no keystore next to the config, and Start fresh creates a new config with a new set of keys.
The headline stays in Bootstrapping mode
The node is still catching up, and the line beside the headline says why:
Catching up — replaying stored blocks.orSyncing with the chain: wait. A first sync can take a while.No block progress for 10 minutes — the node may have lost its peers. Try stopping and starting it.: click Stop Node, then Start Node.Genesis is … — the node can't finish syncing until then. Its config likely points at the wrong network.: the config was generated for another network. In Settings, click Start a new node to generate a config for the public testnet.
If the node is stuck or will not start at all, the Reset the database card in Settings shows the database folder. Stop the node, delete that folder, then start the node again. It re-syncs the chain from its peers, and your keys and config files are untouched.
The headline reads Node stopped or Disconnected
- Node stopped means the node process stopped unexpectedly. Click Start Node. If the same thing happens again, restart the app.
- Disconnected means the app lost contact with the node service. Restart the app.
nix run takes a long time to build
This is expected behaviour on a cold cache. The build could take over an hour in some cases.